Why You'll Love It
- - The contrast of flaky pastry and silky custard is unforgettable
- - Simple ingredients let the technique shine
- - Makes an elegant centerpiece for any gathering
- - Easy to assemble ahead of time for stress‑free hosting
*Absolutely divine, the layers melt in my mouth and the flavor linger like a sweet memory.*
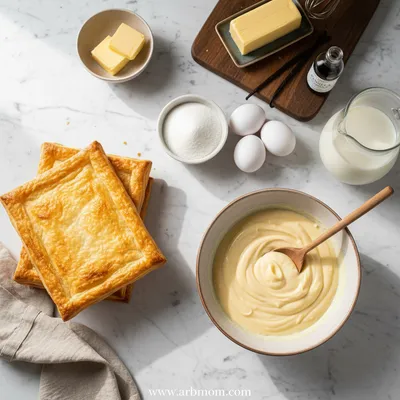
Essential Ingredient Guide
- Puff pastry sheets: Choose high‑quality, butter‑rich sheets; keep them cold until ready to bake for maximum flakiness.
- Vanilla custard (crème pâtissière): A smooth custard adds sweetness and moisture; whisk constantly to avoid lumps.
- Whipped cream: Lightly sweetened and folded in a touch of vanilla; it softens the layers between pastries.
- Powdered sugar: For dusting the top; sift to prevent clumps and create a snow‑like finish.
- Lemon zest: A hint of citrus brightens the custard, balancing the richness.
- Margarine (optional): If pastry sheets are thin, brushing with melted margarine adds extra golden color.
Complete Cooking Process
-
Ingredient Readiness:
Measure and chill pastry, prepare custard and whip the cream; keep everything at cool room temperature before assembly.
-
Flavor Development:
Bake the pastry until golden, then allow it to cool completely before layering with warm custard.
-
Texture Control:
Layer pastry with custard and cream, ensuring each sheet is evenly coated for a tender bite.
-
Finishing Touches:
Dust generously with powdered sugar and add a whisper of lemon zest just before serving.
-
Serving Timing:
Refrigerate the assembled cake for at least two hours; this lets the flavors meld and the pastry soften slightly.
- Use a rolling pin to flatten baked pastry for an even surface
- Cover the cake with cling film while chilling to prevent a dry crust
- Taste the custard before adding sugar; adjust to your sweetness preference
- Slice with a long, serrated knife warmed in hot water for clean cuts
Pro Tips
Well, I’ve found that a little patience in the chilling step makes all the difference. The layers settle, the flavors marry, and the cake feels like a quiet celebration of texture. Take your time, and enjoy each step as a gentle pause in your day.
The essence of the dish:
A fun fact or historical angle:
Flavor or sensory focus:
You Must Know
- Never over‑bake pastry; it should stay light
- Custard must be thick enough to hold its shape
- Allow the cake to rest so flavors meld
Frequently Asked Questions
→ Can I make the puff pastry from scratch?
Yes, homemade puff pastry adds extra butter flavor, but be sure to keep the dough cold and roll it thin for true flakiness.
→ How long can I store the cake?
The assembled cake keeps well refrigerated for up to three days; cover tightly to retain moisture.
→ Is there a gluten‑free version?
Use a gluten‑free puff pastry alternative and ensure the custard thickener is cornstarch instead of flour.
→ Can I freeze the cake?
Freeze un‑sliced layers separately with parchment between; thaw in the refrigerator and assemble just before serving.
→ What if I don’t have a stand mixer?
Whisk the cream by hand; it takes a bit longer but yields the same airy result.
→ Do I need to soak the pastry in custard?
A light brush of custard on each sheet is enough; the cake will soften as it rests, no heavy soaking required.
Chef's Tips
Allow the cake to rest; this lets the pastry soften slightly for a perfect bite.,If the custard seems too runny, return it to low heat briefly until thicker.,Slice with a warm, serrated knife for clean edges.
Nutrition Facts
per serving
420
Calories
6g
Protein
34g
Carbs
28g
Fat
Taste Profile
Buttery, vanilla‑sweet, with a gentle citrus brightness
Ingredient Substitutions
Don't have an ingredient? Try these alternatives
Roll thin and keep cold; it adds an artisanal touch.
Whip chilled coconut cream; it yields a similar light texture.
Recipe Variations
Try these delicious twists on the original
Chocolate Version
Add cocoa powder to the custard and dust the top with cocoa powder for a richer flavor.
Berry Napoleon
Layer fresh raspberries and a hint of raspberry jam between the pastry and custard.
Common Mistakes to Avoid
Learn from others' mistakes for perfect results
- Over‑baking pastry, which makes it too hard
- Under‑seasoning custard, leading to bland layers
- Skipping the chilling step, causing a crumbly texture
Meal Prep & Storage
Make Ahead Tips
You can bake the pastry sheets and prepare the custard up to 24 hours in advance; store each component separately, then assemble just before serving.
Leftover Ideas
Refrigerate leftovers; slice a piece and warm gently in a skillet with a splash of milk to revive the pastry's softness.
Perfect Pairings
Serve this with...
Cooking Timeline
Preheat oven, line baking sheets, and arrange pastry sheets.
Bake pastry sheets until golden; let cool.
Prepare custard on the stovetop, then chill.
Whip cream to soft peaks.
Layer pastry, custard, and cream; finish with top pastry.
Refrigerate assembled cake to set flavors.
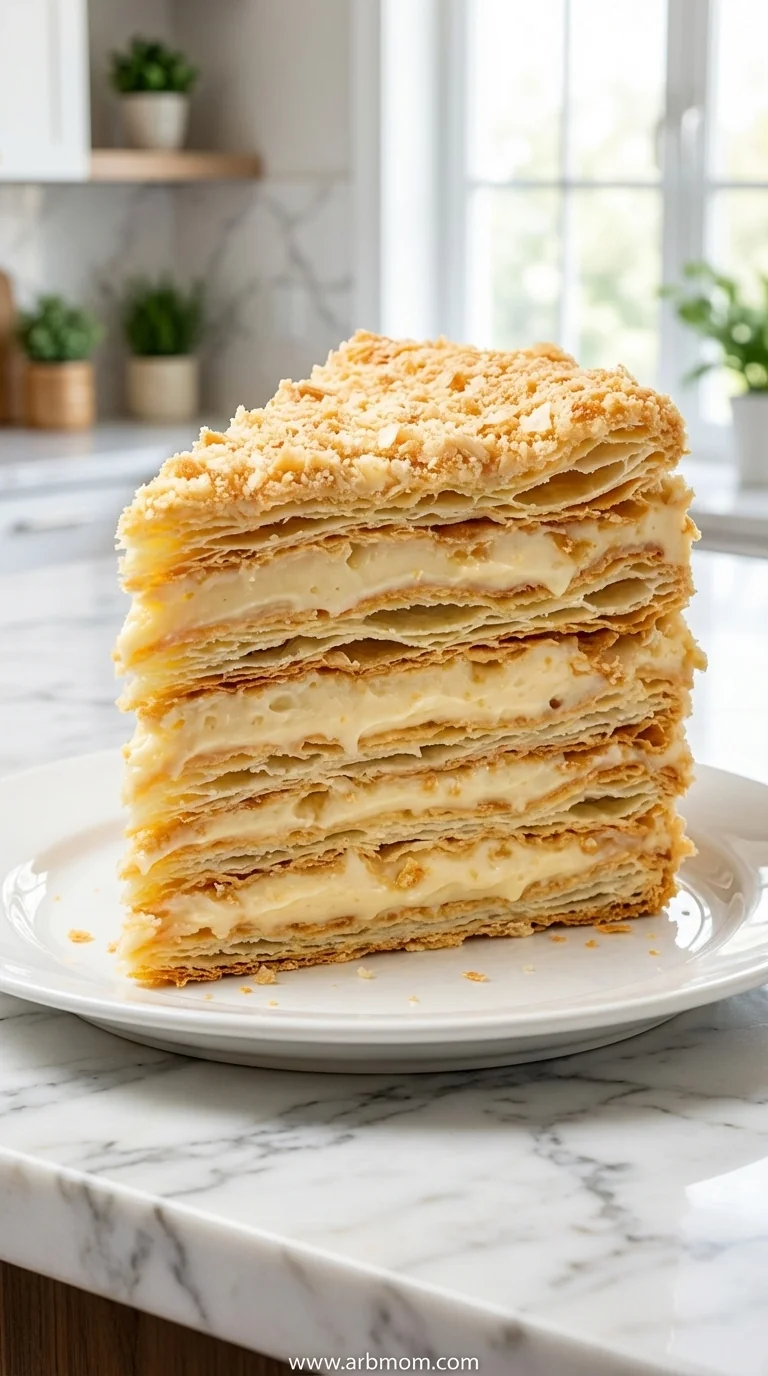
Russian Napoleon Cake – Classic Puff Pastry Dessert
Indulge in layers of flaky puff pastry and silky vanilla custard, layered with velvety whipped cream, creating a timeless Russian treat that feels like a warm hug on the palate.
Timing
Prep Time
45 Minutes
Cook Time
1 Hour 30 Minutes
Total Time
2 Hours 15 Minutes
Recipe Details
Ingredients
Main Ingredients
- 01 6 sheets frozen puff pastry, thawed
- 02 2 cups whole milk
- 03 4 egg yolks
- 04 1/2 cup granulated sugar
- 05 3 tbsp cornstarch
- 06 1 tsp vanilla extract
- 07 1 cup heavy whipping cream
- 08 2 tbsp powdered sugar
- 09 Zest of 1 lemon
For the Assembly
- 01 Additional powdered sugar for dusting
- 02 Fresh berries (optional, for garnish)
Instructions
Preheat the oven to 400°F (200°C). Line baking sheets with parchment; place each puff pastry sheet on a separate sheet.
Bake the pastry for 12‑15 minutes, until golden and puffed. Let cool completely on a wire rack.
While pastry cools, whisk milk, egg yolks, sugar, and cornstarch in a saucepan; cook over medium heat, stirring constantly until thickened. Remove from heat, stir in vanilla and lemon zest, then chill.
Whip the heavy cream with powdered sugar until soft peaks form; set aside.
Lay the first pastry sheet on a serving platter, spread a thin layer of custard, then a dollop of whipped cream. Repeat, alternating layers, ending with a pastry sheet on top.
Dust the top generously with powdered sugar and, if desired, garnish with fresh berries. Refrigerate for at least two hours before slicing.
Notes & Tips
- 1 Allow the cake to rest; this lets the pastry soften slightly for a perfect bite.
- 2 If the custard seems too runny, return it to low heat briefly until thicker.
- 3 Slice with a warm, serrated knife for clean edges.
Tools You'll Need
-
Oven
-
Baking sheets
-
Parchment paper
-
Saucepan
-
Whisk
-
Electric mixer
-
Long serrated knife
Must-Know Tips
- Keep pastry cold until baking; warmth creates soggy layers.
- Taste custard before adding all the sugar; adjust to your preference.
- Cover the assembled cake with cling film while chilling to prevent drying.
Professional Secrets
- Use clarified butter for the pastry to achieve extra crispness.
- Add a pinch of salt to the custard; it enhances vanilla sweetness.
- Dust with powdered sugar just before serving for a fresh look.

Recipe by
EmilyEmily is a passionate food blogger and seasoned recipe creator at Arbmom Recipe, where she brings her culinary expertise and creativity to home cooks ...
Get Delicious Recipes Weekly
Join 25,000+ home cooks getting our best recipes straight to their inbox.
Free forever • No spam • Unsubscribe anytime