Why You'll Love It
- - Crispy coating without any dairy or gluten
- - Sweet‑savory teriyaki glaze that clings perfectly
- - Easy bake‑and‑enjoy method for weeknight snacking
- - Perfect for vegans, vegetarians, and anyone craving crunch
*"These wings are a game‑changer—so crispy, so flavorful, and totally guilt‑free!"*
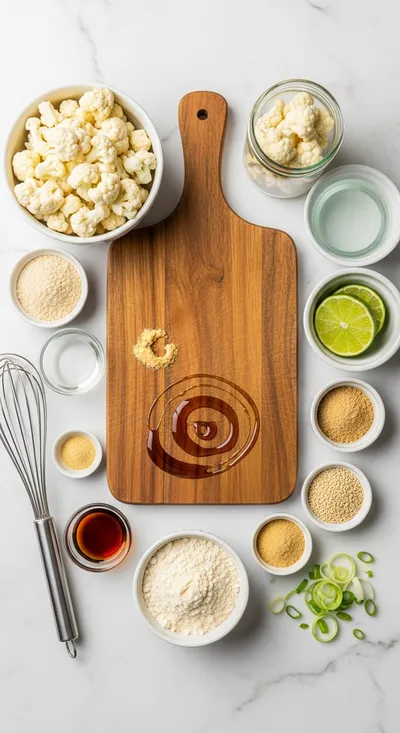
Essential Ingredient Guide
- Cauliflower florets: Choose fresh, firm heads; break into bite‑size pieces for even cooking
- Gluten‑free flour blend: Creates a light, crisp crust; sift to avoid lumps
- Maple syrup: Adds natural sweetness and helps the glaze caramelize
- Tamari (gluten‑free soy sauce): Provides deep umami; look for low‑sodium varieties
- Rice vinegar: Balances the glaze with a gentle acidity
- Coconut oil: A neutral‑tasting fat that helps the coating turn golden
Complete Cooking Process
-
Ingredient Readiness:
Rinse cauliflower, pat dry, and toss with seasoned flour and oil until each piece is lightly coated.
-
Flavor Development:
Bake the coated florets until they start to crisp, then brush with the teriyaki glaze for a glossy finish.
-
Texture Control:
Return the glazed wings to the oven for a final burst of heat, locking in crunch and shine.
-
Finishing Touches:
Sprinkle toasted sesame seeds and a pinch of scallions just before serving for aroma and color.
-
Serving Timing:
Serve hot, straight from the oven, while the glaze is still warm and the crust is at its crispiest.
- Arrange florets in a single layer; overcrowding makes them soggy
- Use a cooling rack on the baking sheet for even airflow
- Brush glaze twice for a deeper caramelization
- Let wings rest a minute after baking to let the glaze set
Pro Tips
Well, these little tricks take just a moment but they make a world of difference. I find that a minute of patience after the oven gives the glaze a lovely sheen, and the subtle snap you hear when you bite is pure joy. So, go ahead, enjoy the process, and relish the quiet satisfaction of a perfect bite.
The essence of the dish:
A fun fact or historical angle:
Flavor or sensory focus:
You Must Know
- Use gluten‑free flour to keep the coating light
- Maple syrup adds depth without overpowering
- Baking, not frying, preserves the natural veg goodness
Frequently Asked Questions
→ Can I use almond flour instead of gluten‑free flour?
Yes, almond flour works well and adds a nutty note, just be sure to sift it so the coating stays light.
→ Do I need to pre‑heat the oven?
Absolutely—pre‑heating to 425°F ensures the wings crisp up quickly and the glaze caramelizes.
→ How do I store leftovers?
Place them in an airtight container in the fridge for up to three days; re‑heat in a hot oven to revive the crunch.
→ Can I make these ahead of time?
Yes, you can coat and bake the florets, then store; add the glaze and finish baking right before serving.
→ Is this recipe vegan‑friendly?
All ingredients are plant‑based; just double‑check your tamari for any hidden dairy.
→ What side pairs well with these wings?
A simple cucumber‑sesame salad or steamed jasmine rice balances the sweet glaze nicely.
Chef's Tips
If you prefer a spicier glaze, add a pinch of red pepper flakes to the sauce.,For extra crunch, swap the cooling rack for a wire mesh tray.,Let the wings rest a minute after the final bake to let the glaze set.
Nutrition Facts
per serving
210
Calories
6g
Protein
28g
Carbs
9g
Fat
Taste Profile
A harmonious sweet‑savory glaze with a gentle ginger heat
Ingredient Substitutions
Don't have an ingredient? Try these alternatives
Use the same amount; it’s slightly less viscous.
Milder salt profile; reduce added salt accordingly.
Recipe Variations
Try these delicious twists on the original
Spicy Version
Add 1 tsp sriracha and a pinch of red pepper flakes to the glaze for a bold kick.
Mediterranean Style
Swap maple syrup for agave, drizzle with tahini, and garnish with chopped olives and feta (optional).
Common Mistakes to Avoid
Learn from others' mistakes for perfect results
- Overcrowding the pan, which leads to soggy wings
- Skipping the glaze thickening step, resulting in a watery coating
- Using too much oil, making the coating greasy instead of crisp
Meal Prep & Storage
Make Ahead Tips
You can coat and bake the cauliflower florets up to 24 hours ahead; store in the fridge and add glaze when ready to serve.
Leftover Ideas
Reheat gently in a skillet with a splash of water to revive the crispness without drying out.
Perfect Pairings
Serve this with...
Cooking Timeline
Prep cauliflower, wash, dry, and cut into florets
Toss florets in seasoned flour and oil, then arrange on rack
Bake first round, turn, and begin glaze preparation
Brush glaze on baked florets, return to oven to caramelize
Finish with sesame seeds, scallions, and serve
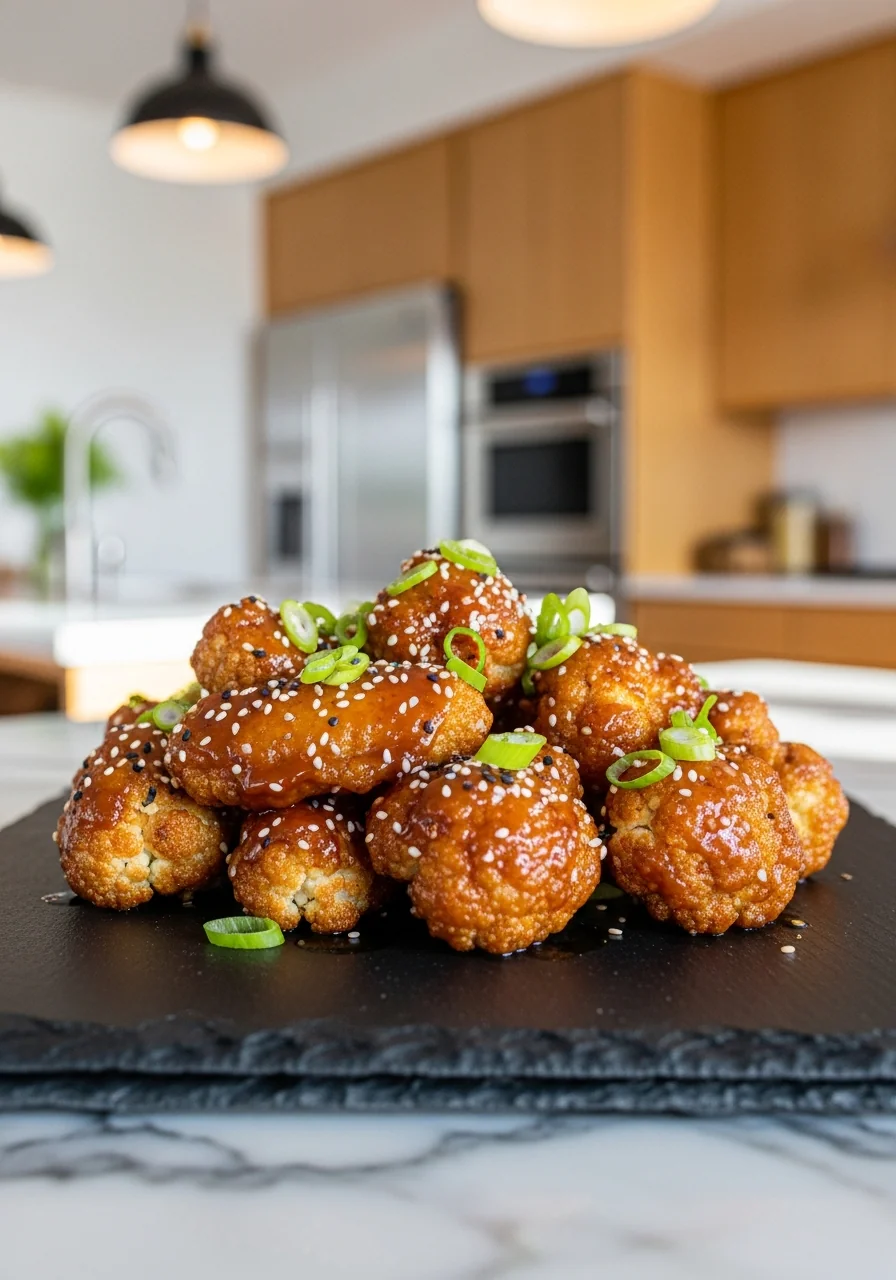
Vegan Gluten-Free Teriyaki Cauliflower Wings
Crispy vegan gluten‑free teriyaki cauliflower wings that bring a gentle heat, sweet umami, and a satisfying crunch—perfect for a cozy night in or a lively gathering.
Timing
Prep Time
15 Minutes
Cook Time
25 Minutes
Total Time
40 Minutes
Recipe Details
Ingredients
Main Ingredients
- 01 1 large cauliflower head, cut into bite‑size florets
- 02 1/2 cup gluten‑free flour blend
- 03 2 tbsp coconut oil, melted
- 04 1 tsp sea salt
- 05 1/2 tsp black pepper
Teriyaki Glaze
- 01 1/4 cup tamari (gluten‑free soy sauce)
- 02 2 tbsp maple syrup
- 03 1 tbsp rice vinegar
- 04 1 tsp grated fresh ginger
- 05 1 clove garlic, minced
- 06 1 tsp toasted sesame oil
Finishing
- 01 1 tbsp toasted sesame seeds
- 02 2 tbsp chopped scallions
Instructions
Preheat your oven to 425°F (220°C) and line a baking sheet with parchment; set a cooling rack on top.
In a large bowl, whisk together the gluten‑free flour, sea salt, and pepper; drizzle the melted coconut oil and toss until each cauliflower piece is lightly coated.
Arrange the coated florets in a single layer on the rack; bake for 15 minutes, turning once, until they start to turn golden.
While the cauliflower bakes, combine tamari, maple syrup, rice vinegar, ginger, garlic, and sesame oil in a small saucepan; simmer gently for 3‑4 minutes until slightly thickened.
Remove the cauliflower from the oven, brush generously with the teriyaki glaze, then return to the oven for another 5‑7 minutes to caramelize.
Once crisp and glossy, sprinkle sesame seeds and scallions; serve hot with a side of buffalo cauliflower bites for extra heat if desired.
Notes & Tips
- 1 If you prefer a spicier glaze, add a pinch of red pepper flakes to the sauce.
- 2 For extra crunch, swap the cooling rack for a wire mesh tray.
- 3 Let the wings rest a minute after the final bake to let the glaze set.
Tools You'll Need
-
Oven
-
Baking sheet
-
Cooling rack
-
Large mixing bowl
-
Small saucepan
-
Basting brush
Must-Know Tips
- Don't overcrowd the pan, Cook in batches to keep each piece crisp
- Let the glaze thicken slightly before brushing, Allows better adhesion
- Taste the glaze before using, Adjust sweetness or salt as needed
Professional Secrets
- Room temperature cauliflower, Ensures even cooking
- High heat sear before glazing, Creates a perfect crust
- Use a wire rack, Promotes airflow for ultimate crispness

Recipe by
OliviaOlivia is a passionate food blogger and recipe creator at Arbmom Recipe, where she brings her culinary expertise and love for home cooking to a vibran ...
Get Delicious Recipes Weekly
Join 25,000+ home cooks getting our best recipes straight to their inbox.
Free forever • No spam • Unsubscribe anytime