Why You'll Love It
- - No baking required, simple assembly
- - Classic flavors that evoke nostalgia
- - Elegant presentation with minimal effort
- - Perfect for gatherings or quiet evenings
“The texture is like velvet, and the coffee flavor is perfectly balanced—pure comfort in a cup.”
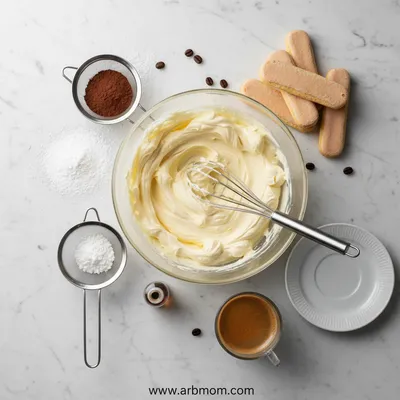
Essential Ingredient Guide
- Ladyfingers: Choose crisp, dry ladyfingers; they absorb coffee without falling apart.
- Mascarpone cheese: Use full‑fat mascarpone for a rich, buttery cream.
- Espresso: Freshly brewed, strong espresso adds depth and a gentle bitterness.
- Egg yolks and sugar: Whisk together until pale and airy; this creates a light custard base.
- Cocoa powder: Unsweetened cocoa dusted on top provides a subtle bitter contrast.
- Dark chocolate shavings: Optional garnish that adds texture and visual appeal.
Complete Cooking Process
-
Ingredient Readiness:
Gather all components, whisk yolks with sugar, and have coffee cooled.
-
Flavor Development:
Coffee‑soaked ladyfingers absorb flavor while the mascarpone blend stays airy.
-
Texture Control:
Layer gently to keep the sponge delicate and the cream smooth.
-
Finishing Touches:
Dust cocoa, add chocolate shavings, and chill for at least 4 hours.
-
Serving Timing:
Serve straight from the fridge; the dessert is at its silky best when chilled.
- Use room‑temperature mascarpone to avoid lumps
- Cool coffee completely before dipping ladyfingers
- Cover tightly while chilling to prevent drying out
- Dust cocoa just before serving for fresh aroma
Pro Tips
Well, those small tweaks make a big difference. I remember once forgetting to cool the coffee and ending up with soggy layers—dang, that was a mess. So, take a moment, let everything settle, and you’ll get that perfect, elegant slice that feels both light and indulgent. Enjoy the quiet moment as the sweet scent rises.
The essence of the dish:
A fun fact or historical angle:
Flavor or sensory focus:
You Must Know
- Use fresh espresso, not instant
- Do not over‑soak ladyfingers
- Chill long enough for flavor melding
Frequently Asked Questions
→ Can I make tiramisu ahead of time?
Yes, refrigerate for up to 24 hours; the flavors improve with time.
→ Do I need to use raw eggs?
If you’re concerned, use pasteurized eggs or substitute with a whipped cream base.
→ What coffee strength is best?
A strong, dark espresso works best; it provides the bold bitterness needed.
→ Can I add liqueur for extra flavor?
Traditionally a splash of marsala is added, but you can omit it for a non‑alcohol version.
→ How do I store leftovers?
Cover tightly and keep refrigerated; consume within 2 days for best texture.
→ Is tiramisu gluten‑free?
Standard ladyfingers contain gluten; you can substitute gluten‑free biscuits.
Chef's Tips
For a lighter texture, fold in a small amount of whipped cream at the end.,If using raw eggs, ensure they are fresh and come from a reputable source.,Adjust coffee strength to your taste; more espresso adds bitterness.
Nutrition Facts
per serving
420
Calories
8g
Protein
38g
Carbs
25g
Fat
Taste Profile
A balanced sweet‑bitter coffee cream experience
Ingredient Substitutions
Don't have an ingredient? Try these alternatives
Will be slightly tangier; adjust sugar accordingly.
Ensure they are sturdy enough to hold the coffee.
Recipe Variations
Try these delicious twists on the original
Chocolate Tiramisu
Add melted dark chocolate to the mascarpone mixture and fold in chocolate shavings.
Berry Tiramisu
Layer fresh strawberries or raspberries between the ladyfingers for a fruity twist.
Common Mistakes to Avoid
Learn from others' mistakes for perfect results
- Over‑soaking ladyfingers, which leads to a mushy texture
- Using weak coffee, resulting in bland flavor
- Skipping the chill time, so the layers don’t set properly
Meal Prep & Storage
Make Ahead Tips
You can assemble the tiramisu up to 24 hours ahead; just keep it covered and refrigerated for optimal flavor development.
Leftover Ideas
Reheat gently in a microwave for 10 seconds if you prefer a slightly warm dessert, but it shines best chilled.
Perfect Pairings
Serve this with...
Cooking Timeline
Gather ingredients and whisk egg yolks with sugar.
Fold mascarpone into yolk mixture; set aside.
Prepare coffee mixture and dip ladyfingers quickly.
Layer soaked ladyfingers and cream, dust with cocoa.
Cover and refrigerate for 4+ hours before serving.
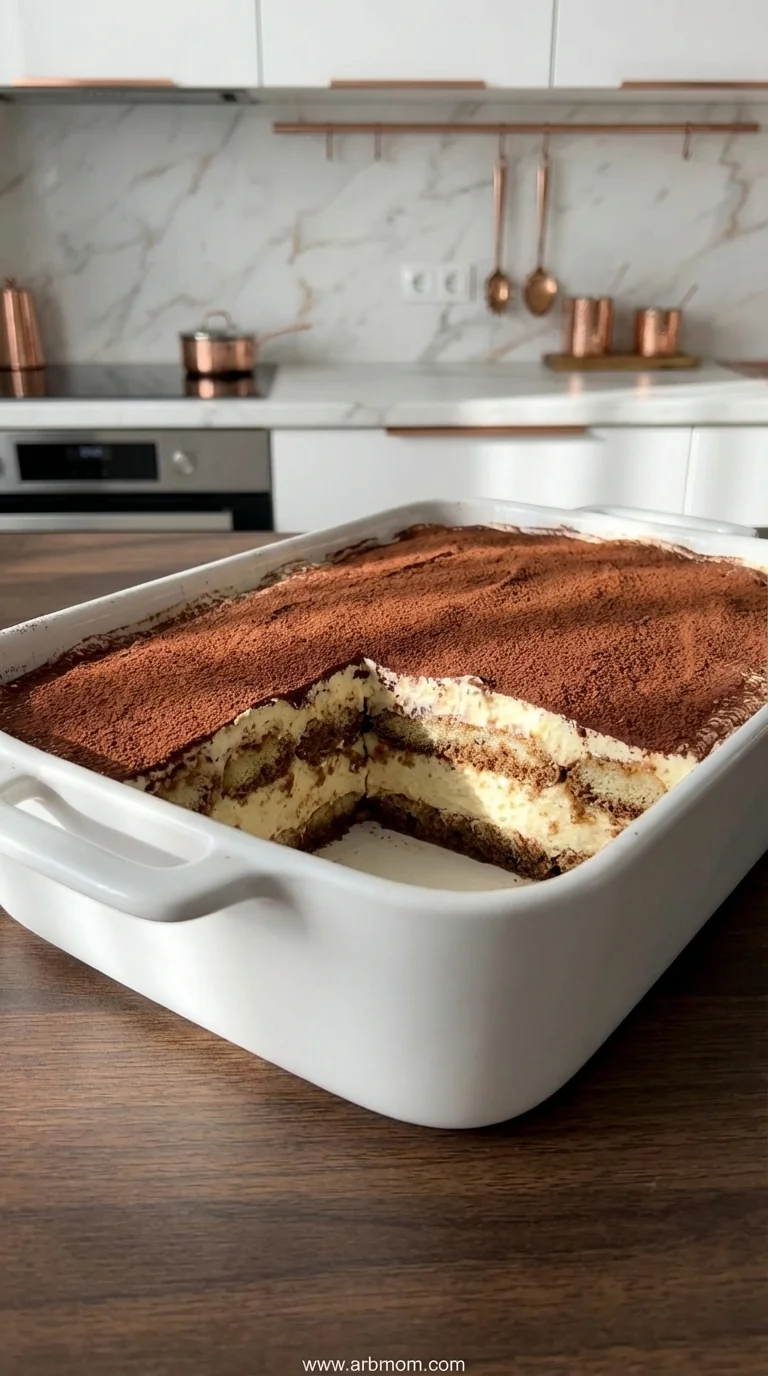
Traditional Italian Tiramisu Recipe
A classic Italian tiramisu that layers coffee‑kissed ladyfingers with airy mascarpone, delivering a gentle sweet‑bitter harmony that feels like an evening lullaby. Explore more Italian desserts.
Timing
Prep Time
20 Minutes
Cook Time
0 Minutes
Total Time
20 Minutes
Recipe Details
Ingredients
Main Ingredients
- 01 24 ladyfinger biscuits
- 02 2 cups strong brewed espresso, cooled
- 03 8 oz mascarpone cheese
- 04 4 large egg yolks
- 05 1/2 cup granulated sugar
- 06 2 tbsp cocoa powder, plus extra for dusting
- 07 2 oz dark chocolate, shaved (optional)
Instructions
In a bowl, whisk egg yolks with sugar until the mixture turns pale and fluffy, about 3‑4 minutes.
Gently fold the mascarpone into the yolk mixture until smooth; set aside.
Mix the cooled espresso with a tablespoon of cocoa powder in a shallow dish.
Quickly dip each ladyfinger into the coffee mixture—just 1‑2 seconds—so they stay moist but not soggy.
Arrange a layer of dipped ladyfingers in a shallow dish, then spread half of the mascarpone cream over them.
Repeat with another layer of soaked ladyfingers and the remaining cream; smooth the top.
Dust the surface generously with cocoa powder and sprinkle chocolate shavings if using.
Cover and refrigerate for at least 4 hours, preferably overnight, before serving.
Notes & Tips
- 1 For a lighter texture, fold in a small amount of whipped cream at the end.
- 2 If using raw eggs, ensure they are fresh and come from a reputable source.
- 3 Adjust coffee strength to your taste; more espresso adds bitterness.
Tools You'll Need
-
Mixing bowls
-
Hand whisk or electric mixer
-
Spatula
-
Shallow dish for dipping
-
Serving dish or individual glasses
Must-Know Tips
- Don't over‑soak ladyfingers, or they'll fall apart
- Let the coffee cool completely before dipping
- Chill long enough for flavors to meld
Professional Secrets
- Room temperature mascarpone prevents lumps
- Use a fine mesh sieve for cocoa dusting
- Cover tightly to avoid the dessert drying out

Recipe by
EmilyEmily is a passionate food blogger and seasoned recipe creator at Arbmom Recipe, where she brings her culinary expertise and creativity to home cooks ...
Get Delicious Recipes Weekly
Join 25,000+ home cooks getting our best recipes straight to their inbox.
Free forever • No spam • Unsubscribe anytime