Why You'll Love It
- - No canning, no hassle, just toss and chill
- - Bright, crisp texture that awakens the palate
- - Flexible – any crunchy veg works
- - Ready in less than a day, perfect for spontaneous snacking
"These pickles are unbelievably fresh and bright—my family can’t get enough!"
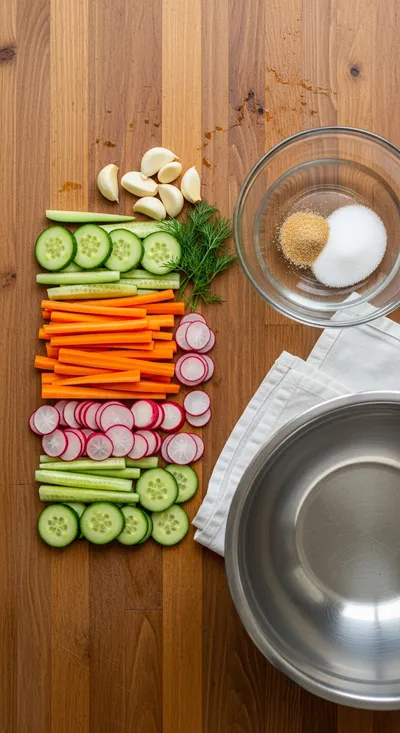
Essential Ingredient Guide
- Fresh cucumbers (or other crunchy veg): Choose firm, thin‑skinned cucumbers; they stay crisp and soak up the brine beautifully.
- Vinegar (white or apple cider): Provides the tangy backbone; pick a mild variety for a balanced flavor.
- Sugar: A touch of sweetness balances acidity and rounds out the brine.
- Salt: Enhances flavor and helps draw water out of the vegetables for better texture.
- Fresh herbs (dill, thyme): Add aromatic depth; dill is classic, but thyme or rosemary work nicely too.
- Garlic and peppercorns: Minor aromatics that give a subtle heat and earthiness without overwhelming.
Complete Cooking Process
-
Ingredient Readiness:
Wash and slice the vegetables, then pat dry. This removes surface grit and helps the brine cling.
-
Flavor Development:
Combine vinegar, water, sugar, salt, and aromatics; heat just until dissolved, then let cool.
-
Texture Control:
Pack veg tightly in a jar, then pour the cooled brine over, ensuring everything is submerged.
-
Finishing Touches:
Seal the jar, refrigerate, and let the flavors meld for at least 4 hours.
-
Serving Timing:
Enjoy straight from the fridge; the pickles stay crisp for up to two weeks.
- Use a weight or small clean stone to keep veggies submerged.
- Add a slice of hot pepper for a gentle kick.
- Refresh the brine after a week for extra crunch.
- Experiment with spices like mustard seeds or coriander.
Pro Tips
Honestly, these little adjustments can transform a simple jar into a personal flavor laboratory. Take your time, taste the brine as it sits, and adjust the herbs or sweetness to suit your mood. The process feels like a quiet conversation with the vegetables, coaxing out their best selves.
The essence of the dish:
A fun fact or historical angle:
Flavor or sensory focus:
You Must Know
- Use firm, fresh vegetables
- Keep brine fully covering the produce
- Refrigerate, don’t leave at room temperature
Frequently Asked Questions
→ How long does it take for the pickles to be ready?
You’ll notice a pleasant tang after about 4‑6 hours, but the optimum flavor develops after 24 hours.
→ Can I use other vegetables?
Absolutely—carrots, radishes, green beans, and even thinly sliced onions work wonderfully.
→ Do I need to sterilize the jar?
No, because the pickles stay refrigerated; a clean jar is sufficient.
→ How long can I keep them in the fridge?
Up to two weeks, though they’re best within the first week for peak crunch.
→ Can I add heat to the brine?
A pinch of red pepper flakes or a slice of jalapeño adds a gentle spice without overwhelming the flavor.
→ Is sugar necessary?
It balances the acidity; you can reduce it or substitute with a sugar‑free sweetener if preferred.
Chef's Tips
If the brine hasn’t fully covered the veg, press them down with a clean weight.,Feel free to swap dill for cilantro for a different herb profile.,Taste the brine before adding; adjust sugar or salt to fit your palate.
Nutrition Facts
per serving
30
Calories
1g
Protein
7g
Carbs
0g
Fat
Taste Profile
Bright, tangy, with a whisper of sweetness
Ingredient Substitutions
Don't have an ingredient? Try these alternatives
Gives a milder, fruitier tang; keep the same amount.
Use slightly less honey as it’s sweeter than sugar.
Recipe Variations
Try these delicious twists on the original
Spicy Version
Add ½ tsp red pepper flakes and a sliced jalapeño to the brine for a gentle heat.
Mediterranean Style
Include sliced red bell pepper, olives, and a sprinkle of oregano for a Mediterranean twist.
Common Mistakes to Avoid
Learn from others' mistakes for perfect results
- Leaving vegetables partially exposed to air, causing them to soften.
- Using hot brine, which can wilt the veggies.
- Over‑salting the brine; it becomes too harsh.
Meal Prep & Storage
Make Ahead Tips
You can prepare the brine and slice the vegetables a day ahead; store them separately, then combine just before chilling.
Leftover Ideas
Reheat gently in a skillet with a splash of brine if you prefer warm pickles, though they shine cold.
Perfect Pairings
Serve this with...
Cooking Timeline
Wash and slice all vegetables; prepare the jar.
Combine vinegar, water, sugar, and salt; bring to a boil.
Add garlic, peppercorns, and dill; let brine cool.
Pack vegetables into the jar and pour cooled brine over.
Seal the jar, place in fridge, and let flavors meld.
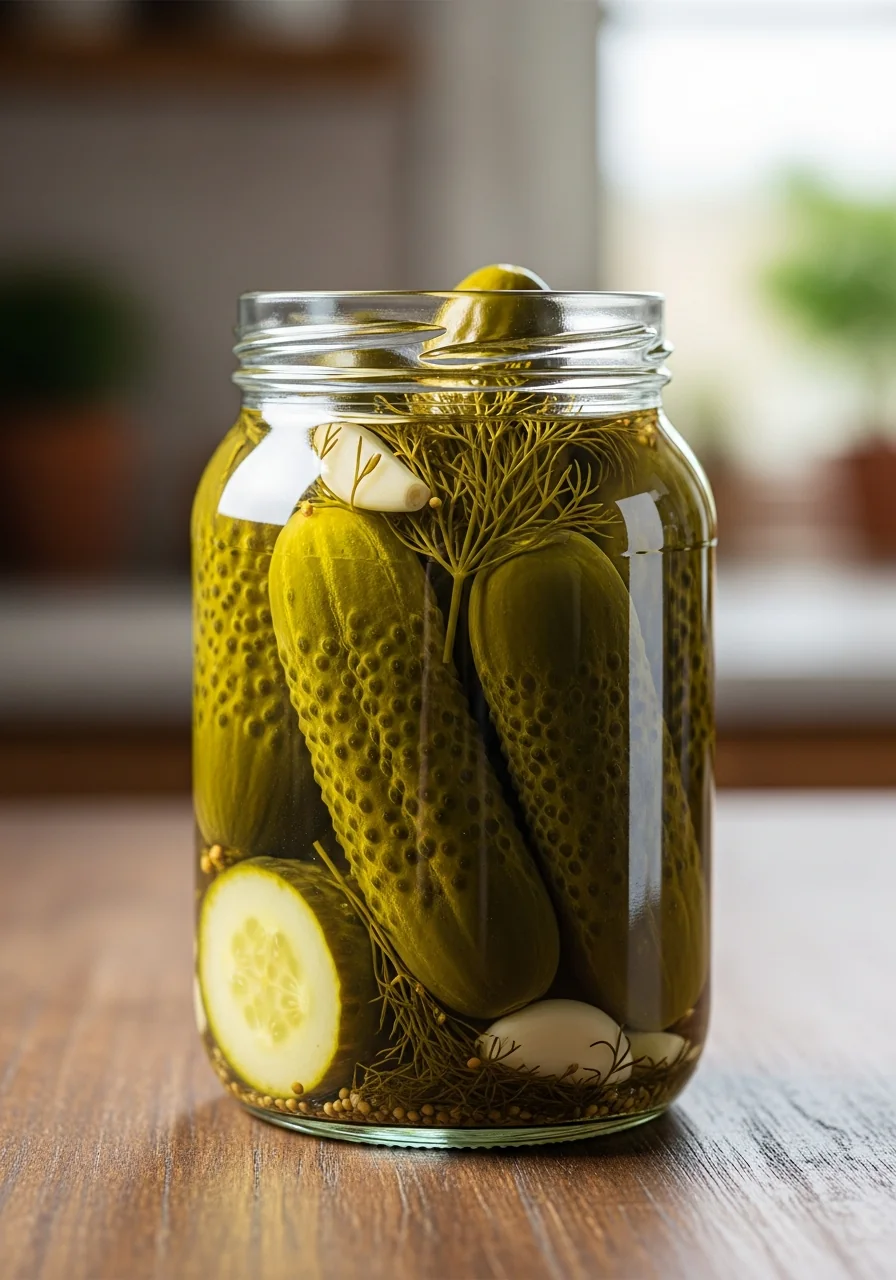
Quick and Easy Refrigerator Pickles
Learn how to make quick and easy refrigerator pickles with crisp vegetables, a tangy brine, and no canning required. Perfect for snacks, a light side, or a bright addition to any meal.
Timing
Prep Time
15 Minutes
Cook Time
5 Minutes
Total Time
25 Minutes (plus chilling time)
Recipe Details
Ingredients
Brine
- 01 1 cup white vinegar
- 02 1 cup water
- 03 2 tbsp sugar
- 04 1 tbsp kosher salt
- 05 2 cloves garlic, smashed
- 06 1 tsp whole peppercorns
- 07 2 sprigs fresh dill
Veggies
- 01 4 small cucumbers, sliced into ¼‑inch rounds
- 02 1 carrot, cut into thin matchsticks
- 03 ½ red onion, thinly sliced
Instructions
Wash all vegetables thoroughly, then slice them as noted. Pat dry with a clean towel.
In a small saucepan combine vinegar, water, sugar, and salt; bring to a gentle boil just until sugar and salt dissolve.
Remove from heat, add garlic, peppercorns, and dill, then let the brine cool to room temperature.
Pack the sliced vegetables tightly into a clean 1‑quart jar, layering garlic and herbs as you go.
Pour the cooled brine over the vegetables, ensuring they are fully submerged. Seal the jar and refrigerate.
After at least 4 hours, taste and enjoy. For deeper flavor, wait 24 hours.
Notes & Tips
- 1 If the brine hasn’t fully covered the veg, press them down with a clean weight.
- 2 Feel free to swap dill for cilantro for a different herb profile.
- 3 Taste the brine before adding; adjust sugar or salt to fit your palate.
Tools You'll Need
-
Sharp knife
-
Cutting board
-
Measuring cups and spoons
-
Small saucepan
-
1‑quart glass jar with lid
Must-Know Tips
- Don’t over‑slice cucumbers; thicker rounds stay crunchier.
- Cool the brine before adding to vegetables to maintain crispness.
- Store the jar in the coldest part of the fridge for best texture.
Professional Secrets
- Add a pinch of mustard seed for subtle tang.
- Use filtered water to avoid cloudy brine.
- Keep the jar airtight; oxygen can soften the veggies.

Recipe by
OliviaOlivia is a passionate food blogger and recipe creator at Arbmom Recipe, where she brings her culinary expertise and love for home cooking to a vibran ...
Get Delicious Recipes Weekly
Join 25,000+ home cooks getting our best recipes straight to their inbox.
Free forever • No spam • Unsubscribe anytime