Why You'll Love It
- - Easy to make with pantry staples
- - Flaky texture that melts in your mouth
- - Sweet cheese filling that isn’t overly rich
- - Perfect for breakfast, snack, or dessert
*"These quesitos are like a warm hug—soft, sweet, and perfectly buttery!"*
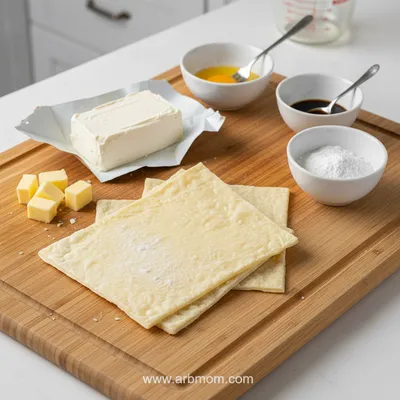
Essential Ingredient Guide
- All‑purpose flour: Provides the structure for the flaky layers; sift to keep the dough light.
- Unsalted butter: Cold butter creates pockets of steam for that coveted crispness.
- Cream cheese: Gives the filling its silky smoothness and gentle tang.
- Vanilla extract: A small splash adds depth without overpowering the cheese.
- Lemon zest: Brightens the sweet filling with a subtle citrus lift.
- Granulated sugar: Sweetens the dough and the filling; adjust to taste.
Complete Cooking Process
-
Ingredient Readiness:
Sift the flour, cube the butter, and let all ingredients sit at room temperature for a few minutes.
-
Flavor Development:
Mix the cheese filling with sugar, vanilla, and zest, then let it rest for 10 minutes to meld flavors.
-
Texture Control:
Fold the butter into the dough using a pastry cutter, then chill the dough before rolling.
-
Finishing Touches:
Brush the tops with egg wash and sprinkle a pinch of sugar before baking.
-
Serving Timing:
Serve the quesitos warm, straight from the oven, when the layers are still crisp.
- Keep butter cold; it’s the secret to flaky layers.
- Don’t over‑work the dough; gentle handling preserves tenderness.
- Chill dough between folds to avoid sticking.
- Brush with melted butter instead of egg wash for extra shine.
Pro Tips
When the quesitos come out of the oven, the kitchen fills with a buttery scent that feels like a quiet afternoon. I pause, let the steam settle, and then slice them, feeling the crisp edge give way to the soft, sweet cheese inside. It’s one of those simple pleasures that feels like home, even on a busy day.
The essence of the dish:
A fun fact or historical angle:
Flavor or sensory focus:
You Must Know
- Work quickly with cold butter
- Rest the dough for best texture
- Seal edges firmly to keep filling inside
Frequently Asked Questions
→ Can I freeze the dough?
Yes, wrap the rolled dough tightly and freeze for up to a month; thaw in the refrigerator before shaping.
→ What if I don’t have cream cheese?
You can substitute ricotta mixed with a bit of butter and sugar for a similar texture.
→ How do I make them extra sweet?
Brush the tops with a thin glaze of honey mixed with a touch of milk before baking.
→ Can I add fruit fillings?
A spoonful of raspberry jam or dulce de leche pairs nicely with the cheese filling.
→ Do I need an egg wash?
An egg wash gives a glossy finish, but melted butter works well for a golden hue too.
→ What’s the ideal baking temperature?
Bake at 375°F (190°C) for 18‑20 minutes, until the tops are lightly browned.
Chef's Tips
If the dough feels sticky, add a tablespoon more flour and chill again.,For extra buttery flavor, brush with melted butter after baking.,These quesitos are best enjoyed warm, but can be reheated gently in a low oven.
Nutrition Facts
per serving
210
Calories
4g
Protein
22g
Carbs
12g
Fat
Taste Profile
A gentle sweet‑buttery flavor with a subtle citrus hint.
Ingredient Substitutions
Don't have an ingredient? Try these alternatives
Adjust sweetness as mascarpone is milder.
Will produce a denser crust; add a bit more butter.
Recipe Variations
Try these delicious twists on the original
Spicy Version
Add a pinch of cayenne and a drizzle of hot honey for a gentle kick.
Mediterranean Style
Incorporate crumbled feta and a sprinkle of oregano into the filling.
Common Mistakes to Avoid
Learn from others' mistakes for perfect results
- Over‑kneading the dough, which makes it tough.
- Using warm butter, resulting in a soft crust.
- Not sealing edges well, causing filling leaks.
Meal Prep & Storage
Make Ahead Tips
Prepare the dough and filling up to step 3; wrap each component separately and refrigerate for up to 24 hours.
Leftover Ideas
Reheat gently in a 300°F oven for 5‑7 minutes to restore crispness.
Perfect Pairings
Serve this with...
Cooking Timeline
Combine dry ingredients and cut in butter.
Add water, form dough, and chill.
Mix cheese filling and let rest.
Roll dough, cut, fill, and shape quesitos.
Egg wash, bake, and cool slightly.
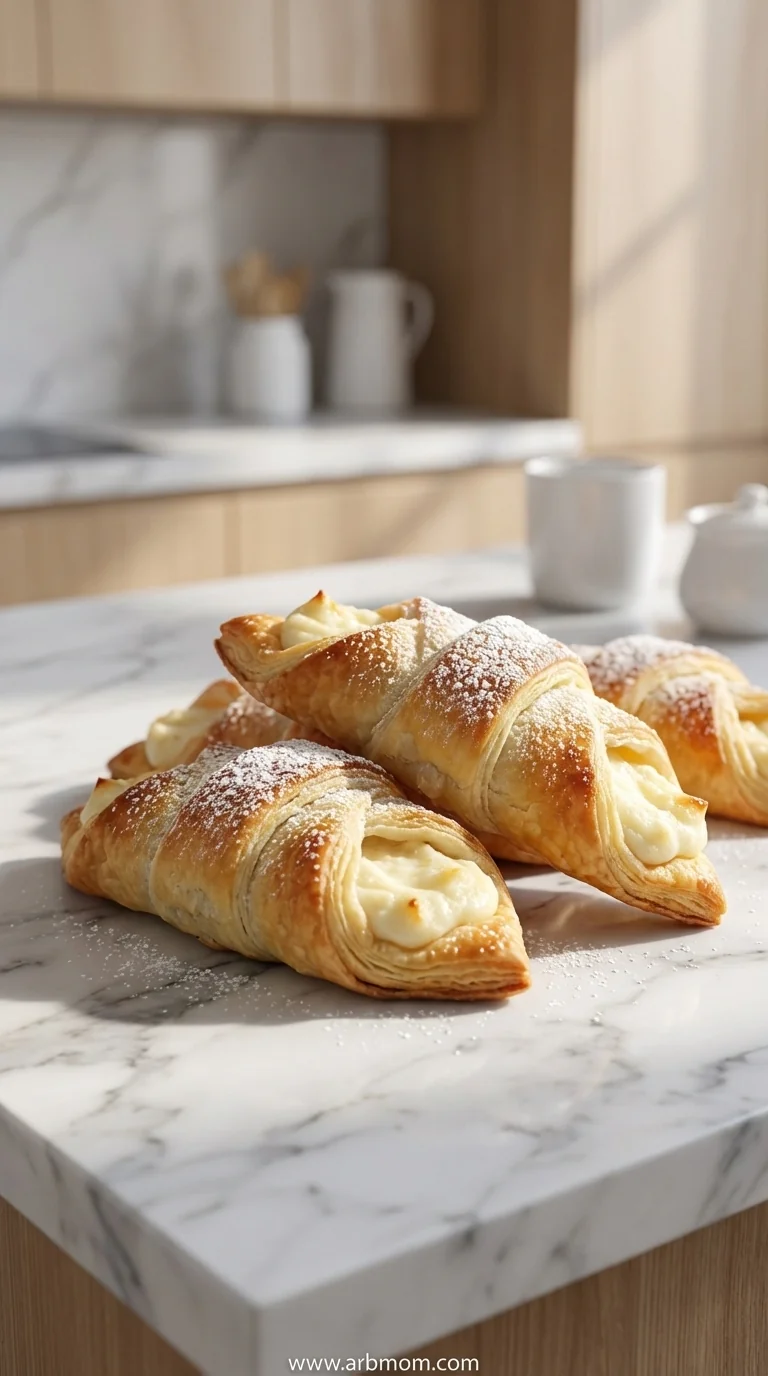
Puerto Rican Quesitos
Flaky, sweet Puerto Rican quesitos filled with creamy cheese—perfect for a quick treat any time of day, offering a buttery bite and mellow vanilla scent.
Timing
Prep Time
20 Minutes
Cook Time
20 Minutes
Total Time
40 Minutes
Recipe Details
Ingredients
Pastry
- 01 3 cups all‑purpose flour
- 02 1 tsp salt
- 03 2 tbsp granulated sugar
- 04 1 cup cold unsalted butter, cubed
- 05 ½ cup ice‑cold water
Filling
- 01 8 oz cream cheese, softened
- 02 ¼ cup powdered sugar
- 03 1 tsp vanilla extract
- 04 1 tsp lemon zest
- 05 2 tbsp milk (optional for smoother texture)
Finishing
- 01 1 egg, beaten (for egg wash)
- 02 1 tbsp granulated sugar for sprinkling
Instructions
In a large bowl combine flour, salt, and sugar; cut in cold butter until the mixture resembles coarse crumbs.
Gradually add ice‑cold water, mixing just until dough comes together. Form into a disk, wrap in plastic, and chill for 30 minutes.
While dough chills, beat cream cheese with powdered sugar, vanilla, lemon zest, and milk until smooth. Chill the filling.
Roll chilled dough on a lightly floured surface to about ¼‑inch thickness. Cut into 4‑inch squares, place a spoonful of filling in the center, fold into triangles, and seal edges with a fork.
Brush each quesito with beaten egg, sprinkle with a pinch of sugar, and place on a parchment‑lined baking sheet.
Bake at 375°F for 18‑20 minutes, or until golden brown. Let cool slightly before serving.
Notes & Tips
- 1 If the dough feels sticky, add a tablespoon more flour and chill again.
- 2 For extra buttery flavor, brush with melted butter after baking.
- 3 These quesitos are best enjoyed warm, but can be reheated gently in a low oven.
Tools You'll Need
-
Rolling pin
-
Pastry cutter or fork
-
Mixing bowls
-
Electric mixer
-
Baking sheet
-
Parchment paper
Must-Know Tips
- Don’t over‑knead the dough; it can become tough.
- Keep butter cold to create steam pockets.
- Seal edges well to prevent filling leakage.
Professional Secrets
- Use ice‑cold water to keep butter from melting.
- Rest the dough to relax gluten, ensuring flaky layers.
- Brush with egg wash for a glossy, golden finish.

Recipe by
EmilyEmily is a passionate food blogger and seasoned recipe creator at Arbmom Recipe, where she brings her culinary expertise and creativity to home cooks ...
Get Delicious Recipes Weekly
Join 25,000+ home cooks getting our best recipes straight to their inbox.
Free forever • No spam • Unsubscribe anytime