Why You'll Love It
- - No oven needed, perfect for hot days
- - Simple ingredients you already have
- - Crunchy crust meets silky ice cream
- - Beautiful presentation with minimal effort
*"The texture reminded me of my grandma's kitchen—crunchy and sweet, just perfect!"*
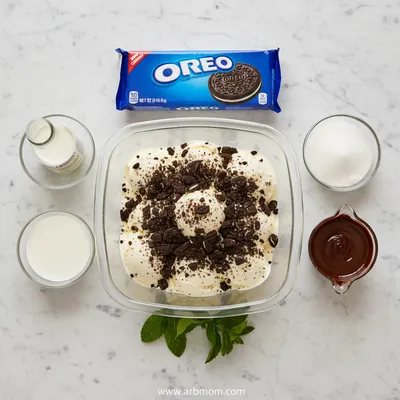
Essential Ingredient Guide
- Oreo cookies: Choose classic chocolate‑cream Oreos; they provide the perfect balance of crunch and chocolate flavor.
- Unsalted butter: Melted butter binds the cookie crumbs into a sturdy crust; keep it just warm enough to melt.
- Vanilla ice cream: Soft‑serve style works best for folding in extra crumbs, creating a subtle ripple of chocolate.
- Whipped cream: Lightly sweetened, it crowns the cake with airy clouds that melt gently on the tongue.
- Heavy cream (for topping): A splash of cream can be folded into the whipped topping for extra silkiness.
- Sugar: Just a pinch in the whipped cream helps stabilize the peaks.
Complete Cooking Process
-
Ingredient Readiness:
Gather all components, crush Oreos, and let butter soften; keep ice cream slightly softened for easy mixing.
-
Flavor Development:
Blend crushed Oreos into the softened ice cream, allowing tiny chocolate flecks to swirl throughout.
-
Texture Control:
Press the cookie‑butter mixture firmly into the pan for an even crust, then smooth the ice cream layer.
-
Finishing Touches:
Pipe or spread whipped cream, garnish with Oreo halves, and let the cake set fully in the freezer.
-
Serving Timing:
Allow the cake to sit at room temperature for 5 minutes before slicing, so slices hold their shape.
- Use a springform pan for easy release.
- Freeze the crust for 10 minutes before adding ice cream.
- Swirl extra Oreo crumbs on top for a decorative finish.
- Slice with a warm knife for clean cuts.
Pro Tips
I remember when I first tried this as a teen—my mother let me warm the knife under hot water, and the slices came out perfectly. It’s these tiny habits that turn a simple dessert into a cherished memory. So, take a moment, enjoy the process, and don’t rush the chill.
The essence of the dish:
A fun fact or historical angle:
Flavor or sensory focus:
You Must Know
- Work quickly once ice cream is softened
- Press crust evenly for stability
- Keep the cake frozen until serving
Frequently Asked Questions
→ Can I use a different cookie?
Yes, chocolate wafers or graham crackers work well, just adjust the butter ratio slightly.
→ How long can I store the cake?
Keep it frozen for up to two weeks; wrap tightly in plastic to prevent ice crystals.
→ Do I need an ice cream maker?
No, simply soften store‑bought ice cream before folding in the crumbs.
→ Can I make a dairy‑free version?
Swap the ice cream for a coconut‑based alternative and use a vegan whipped topping.
→ What garnish adds extra flair?
Crushed Oreos, shaved chocolate, or a drizzle of chocolate ganache works beautifully.
→ How do I prevent the crust from becoming soggy?
Press the crust firmly and freeze it for at least 10 minutes before adding the ice cream layer.
Chef's Tips
If you prefer a richer taste, swirl in a tablespoon of chocolate hazelnut spread before freezing.,For a festive touch, add a sprinkle of edible gold dust on the whipped cream.,Make sure the springform pan is well‑greased to prevent sticking.
Nutrition Facts
per serving
320
Calories
4g
Protein
34g
Carbs
18g
Fat
Taste Profile
Creamy, chocolatey, and lightly sweet
Ingredient Substitutions
Don't have an ingredient? Try these alternatives
Provides a mocha flavor; reduce additional sugar.
Creates a dairy‑free topping with subtle coconut aroma.
Recipe Variations
Try these delicious twists on the original
Peanut Butter Swirl
Add a swirl of creamy peanut butter into the ice cream layer for a nutty twist.
Mint Chocolate
Replace vanilla ice cream with mint chocolate chip and garnish with mint leaves.
Common Mistakes to Avoid
Learn from others' mistakes for perfect results
- Over‑mixing the ice cream, which makes it dense.
- Not chilling the crust before adding ice cream, leading to a soggy base.
- Slicing too early; the cake needs a solid freeze to hold its shape.
Meal Prep & Storage
Make Ahead Tips
Prepare the crust and ice cream layers a day ahead; keep wrapped and frozen. Add whipped topping just before serving.
Leftover Ideas
Slice and let sit at room temperature for a few minutes; enjoy as a quick snack.
Perfect Pairings
Serve this with...
Cooking Timeline
Gather ingredients and crush Oreos for crust.
Press crust into pan and freeze.
Mix softened ice cream with crumbed Oreos.
Assemble layers and freeze for at least 2 hours.
Whip cream and prepare topping.
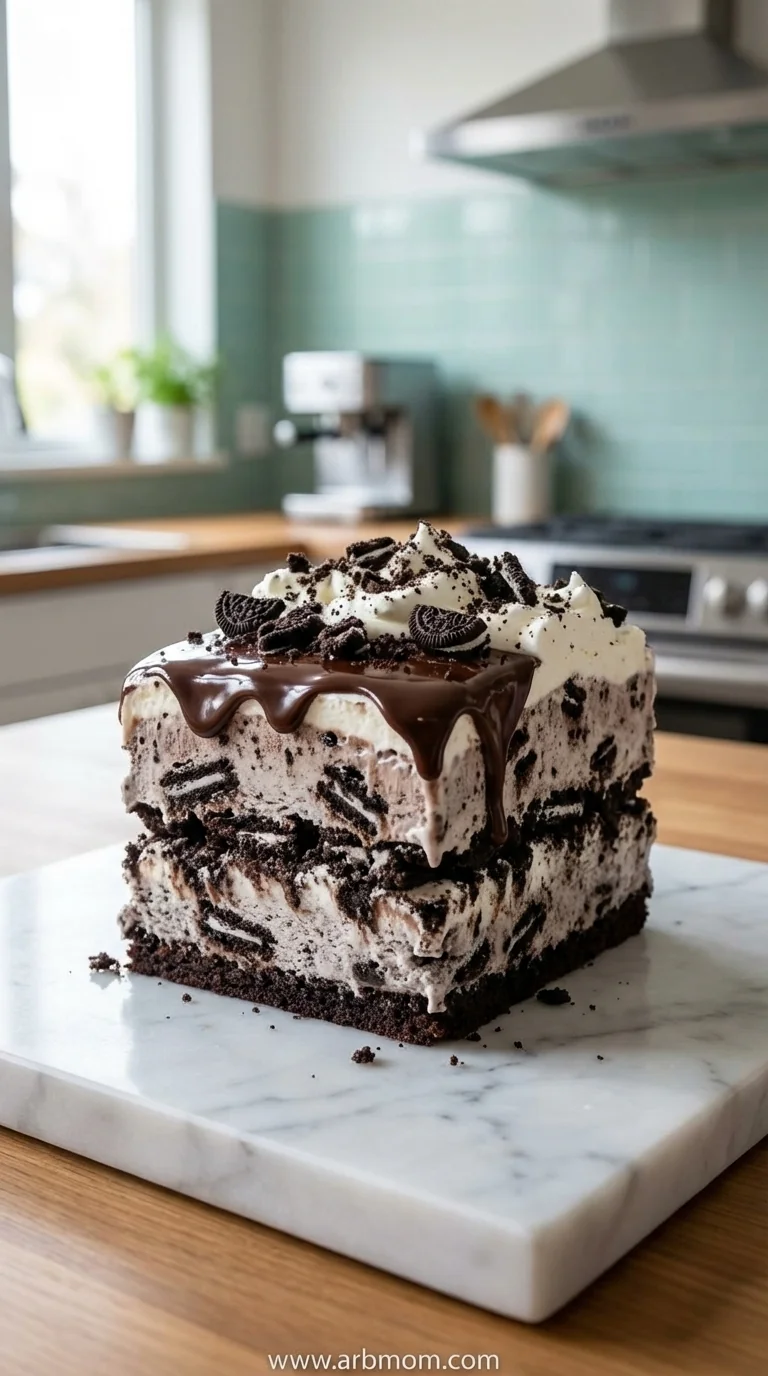
Oreo Ice Cream Cake
A no‑bake Oreo ice cream cake that layers crunchy crust, smooth vanilla ice cream, and a swirl of whipped cream—perfect for a quick, indulgent freeze‑frame of childhood joy.
Timing
Prep Time
20 Minutes
Cook Time
0 Minutes
Total Time
4 Hours (including freeze time)
Recipe Details
Ingredients
Crust
- 01 2 cups Oreo cookies, finely crushed
- 02 1/4 cup unsalted butter, melted
Ice Cream Layer
- 01 2 pints vanilla ice cream, slightly softened
- 02 1/2 cup Oreo cookies, crushed
Topping
- 01 1 cup heavy cream
- 02 2 tbsp powdered sugar
- 03 1 tsp vanilla extract
- 04 Whole Oreo cookies for garnish
Instructions
Combine crushed Oreos and melted butter in a bowl; stir until the crumbs are evenly coated.
Press the crumb mixture firmly into the bottom of a 9‑inch springform pan to form an even crust. Place the pan in the freezer for 10 minutes.
In a large bowl, fold the softened vanilla ice cream with the remaining crushed Oreos until just combined.
Spread the ice cream mixture over the chilled crust, smoothing the top with a spatula. Return to the freezer and freeze for at least 2 hours.
Whip the heavy cream with powdered sugar and vanilla until soft peaks form.
Remove the cake from the freezer, spread or pipe the whipped cream over the surface, and garnish with whole Oreo cookies.
Let the cake sit at room temperature for 5 minutes before slicing to ensure clean cuts.
Notes & Tips
- 1 If you prefer a richer taste, swirl in a tablespoon of chocolate hazelnut spread before freezing.
- 2 For a festive touch, add a sprinkle of edible gold dust on the whipped cream.
- 3 Make sure the springform pan is well‑greased to prevent sticking.
Tools You'll Need
-
Food processor or zip‑top bag (for crushing cookies)
-
9‑inch springform pan
-
Spatula
-
Mixing bowl
-
Electric whisk or hand mixer
Must-Know Tips
- Don’t over‑mix the ice cream; gentle folding keeps it airy.
- Freeze the crust first to avoid sogginess.
- Use a warm knife to slice for clean, neat pieces.
Professional Secrets
- Room temperature ice cream blends more evenly with crumbs.
- Press the crust with the back of a measuring cup for uniform thickness.
- Chill the serving plates for an extra‑cool presentation.

Recipe by
EmilyEmily is a passionate food blogger and seasoned recipe creator at Arbmom Recipe, where she brings her culinary expertise and creativity to home cooks ...
Get Delicious Recipes Weekly
Join 25,000+ home cooks getting our best recipes straight to their inbox.
Free forever • No spam • Unsubscribe anytime