Why You'll Love It
- - Ready in under half an hour, perfect for busy evenings
- - Bright garlic aroma lifts the whole meal
- - Parmesan adds a salty, umami crunch
- - Uses just a handful of pantry staples
*"The garlic butter and Parmesan melt together like a summer sunset on my tongue—pure comfort!"*
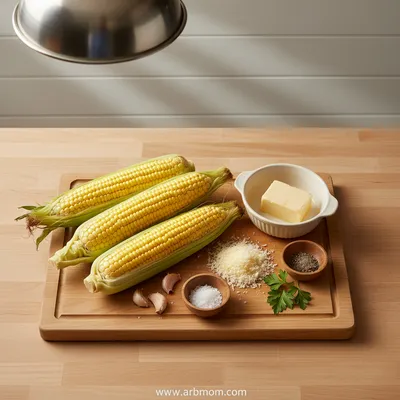
Essential Ingredient Guide
- Fresh corn on the cob: Choose ears with bright green husks and milky kernels; they’ll be sweet and juicy.
- Unsalted butter: Softened butter mixes easily with garlic, creating a silky coating.
- Garlic cloves: Minced finely; the small pieces distribute flavor without overwhelming the corn.
- Parmesan cheese: A fine grate adds a salty, nutty finish that crisps lightly under heat.
- Lemon zest: A pinch brightens the buttery richness with a subtle citrus spark.
- Fresh parsley: Chopped for a final pop of color and fresh herbal note.
Complete Cooking Process
-
Ingredient Readiness:
Shuck the corn, trim the silks, and pat dry. Soften butter, mince garlic, zest lemon, and grate Parmesan.
-
Flavor Development:
Melt butter in a pan, toss in garlic until fragrant, then brush the mixture over each cob.
-
Texture Control:
Grill or roast the corn, turning occasionally, until kernels are tender and lightly charred.
-
Finishing Touches:
Immediately sprinkle Parmesan, lemon zest, and parsley over hot corn so the cheese melts just enough.
-
Serving Timing:
Serve the corn while steam still rises, letting the butter coat each bite.
- Brush butter in two layers for extra richness
- Add a pinch of smoked paprika for a subtle depth
- Use a grill pan if you lack an outdoor grill
- Serve with a squeeze of fresh lemon for brightness
Pro Tips
Well, those little adjustments can turn a simple side into a star. I remember once sprinkling a touch of smoked paprika and it gave the corn a whisper of summer evenings on the porch. So, feel free to experiment—this dish welcomes your personal touch.
The essence of the dish:
A fun fact or historical angle:
Flavor or sensory focus:
You Must Know
- Do not overcook—corn should stay crisp
- Butter should be warm but not hot to avoid burning garlic
- Parmesan adds both flavor and texture
Frequently Asked Questions
→ Can I use frozen corn?
Yes—thaw it first and pat dry. The texture will be slightly softer, but the flavors still shine.
→ What if I don’t have Parmesan?
A good substitute is Pecorino Romano or a blend of grated mozzarella and nutritional yeast for a similar salty bite.
→ Should I grill or bake the corn?
Both work well; grilling adds char, while baking gives a more uniform heat. Choose whatever you prefer.
→ Can I make this ahead of time?
Prepare the garlic butter and grate the cheese in advance. Brush and finish the corn just before serving.
→ Is this recipe gluten‑free?
Absolutely—no gluten ingredients are used.
→ How spicy can I make it?
Add a pinch of red pepper flakes to the butter for a gentle heat that complements the sweetness.
Chef's Tips
If you prefer a smoky flavor, add a pinch of smoked paprika to the butter.,Use fresh herbs for the brightest flavor; dried parsley works in a pinch.,For extra crunch, broil the corn for the last minute after adding Parmesan.
Nutrition Facts
per serving
210
Calories
7g
Protein
28g
Carbs
9g
Fat
Taste Profile
A buttery, garlicky corn with a salty cheese finish
Ingredient Substitutions
Don't have an ingredient? Try these alternatives
Will reduce richness but still carry garlic flavor
Gives a cheesy note for dairy‑free diners
Recipe Variations
Try these delicious twists on the original
Spicy Version
Add ½ tsp red pepper flakes to the butter for a gentle heat.
Herb‑Infused
Mix chopped thyme and basil into the butter for an aromatic twist.
Common Mistakes to Avoid
Learn from others' mistakes for perfect results
- Leaving the butter too cold – it won’t spread evenly.
- Over‑cooking corn – it becomes mushy and loses crunch.
- Adding Parmesan too early – it can burn on high heat.
Meal Prep & Storage
Make Ahead Tips
You can mince the garlic and grate the Parmesan a day ahead; store them separately in airtight containers.
Leftover Ideas
Reheat gently in a skillet with a pat of butter; add a splash of water to keep kernels moist.
Perfect Pairings
Serve this with...
Cooking Timeline
Prep corn, soften butter, mince garlic, zest lemon.
Grill corn, turning and brushing with garlic butter.
Add Parmesan, zest, parsley; let cheese melt lightly.
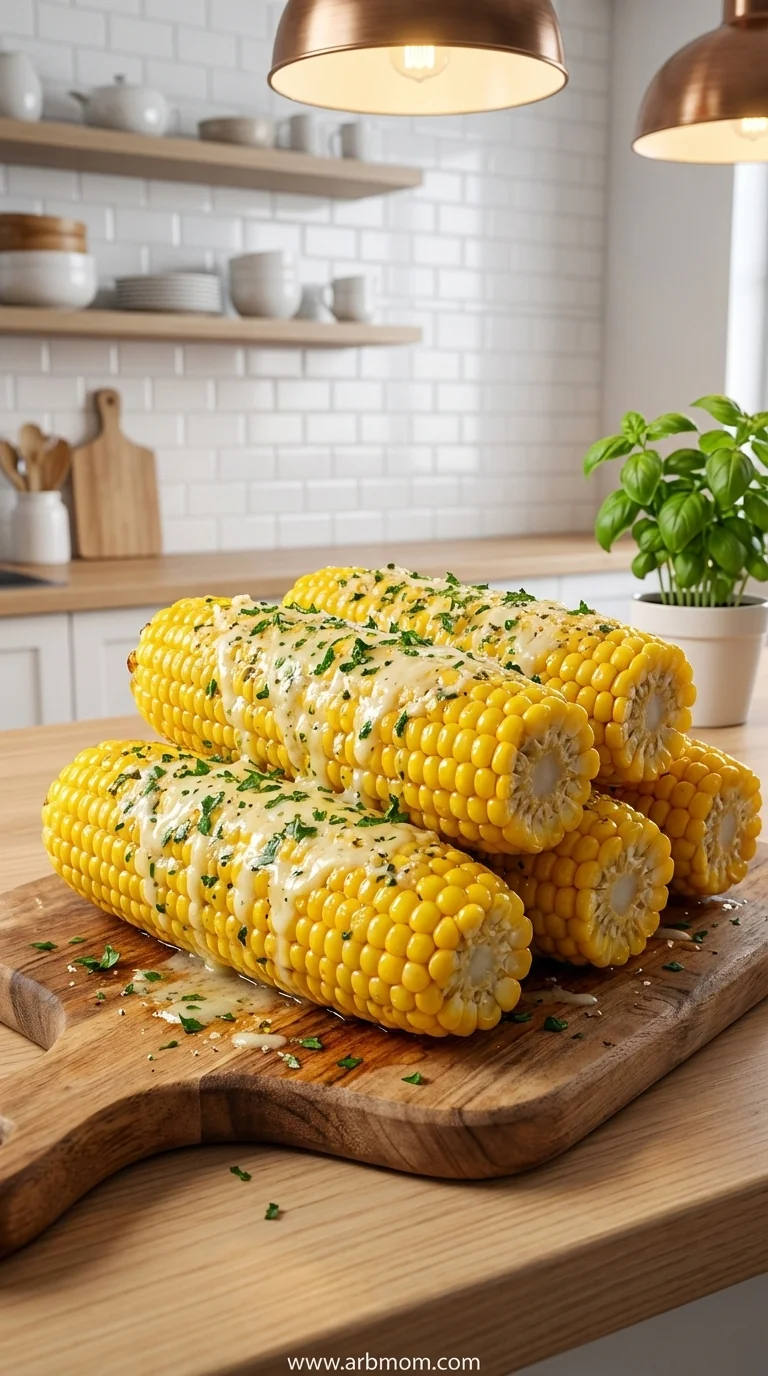
Garlic Parmesan Corn on the Cob – Easy Summer Side
Sweet summer corn brushed with garlic butter and finished with a blanket of Parmesan—quick, comforting, and perfect for any backyard gathering.
Timing
Prep Time
10 Minutes
Cook Time
15 Minutes
Total Time
25 Minutes
Recipe Details
Ingredients
Main Ingredients
- 01 4 ears of fresh corn, husked
- 02 4 tbsp unsalted butter, softened
- 03 3 cloves garlic, minced
- 04 1/3 cup grated Parmesan cheese
- 05 1 tsp lemon zest
- 06 1 tbsp fresh parsley, chopped
- 07 Salt and pepper to taste
Instructions
Preheat a grill or grill pan over medium‑high heat. While it warms, brush each corn ear with a thin layer of softened butter.
In a small bowl, combine the remaining butter, minced garlic, a pinch of salt, and pepper. Mix until fragrant.
Place the corn on the grill, turning every 2‑3 minutes, and brush with the garlic‑butter mixture as it cooks. Cook for about 10‑12 minutes, until kernels are tender and slightly charred.
Remove the corn, immediately sprinkle the grated Parmesan, lemon zest, and parsley over each hot ear so the cheese melts just enough.
Serve right away, perhaps with a wedge of lemon and an extra drizzle of butter if you like. Pair with steak for a satisfying meal.
Notes & Tips
- 1 If you prefer a smoky flavor, add a pinch of smoked paprika to the butter.
- 2 Use fresh herbs for the brightest flavor; dried parsley works in a pinch.
- 3 For extra crunch, broil the corn for the last minute after adding Parmesan.
Tools You'll Need
-
Grill or grill pan
-
Basting brush
-
Small mixing bowl
-
Microplane or fine grater
-
Tongs
-
Serving platter
Must-Know Tips
- Don't overcrowd the grill, give each ear space to char evenly.
- Let the butter soften at room temperature for smooth mixing.
- Taste the butter before brushing; adjust seasoning as needed.
Professional Secrets
- Brush butter in two stages for layered richness
- Use high heat for quick char without overcooking kernels
- Add cheese at the end so it melts but stays slightly crisp

Recipe by
DanielDaniel is a passionate food blogger and recipe creator at Arbmom Recipe, where he brings his culinary expertise and love for home cooking to a vibrant ...
Get Delicious Recipes Weekly
Join 25,000+ home cooks getting our best recipes straight to their inbox.
Free forever • No spam • Unsubscribe anytime