Why You'll Love It
- - No oven needed, perfect for hot days
- - Layers stay firm, yet melt in your mouth
- - Elegant presentation without the fuss
- - Versatile enough for celebrations or simple treats
*"The cake tastes like a nostalgic pastry, yet it’s so easy to make!"*
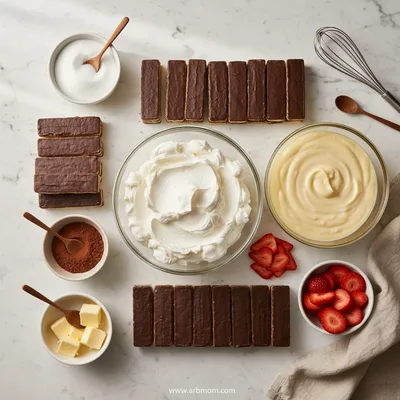
Essential Ingredient Guide
- Ladyfingers or sponge cake: Choose fresh, airy biscuits; they absorb the cream without turning soggy.
- Vanilla pastry cream: A thick custard provides the classic éclair filling; use real vanilla beans for depth.
- Dark chocolate glaze: Adds a glossy finish and a hint of bitterness to balance the sweet cream.
- Butter: Melted butter in the glaze gives a smooth sheen and richness.
- Lemon zest: A touch of zest brightens the pastry cream, echoing the subtle acidity in traditional éclairs.
- Powdered sugar: Sweetens the glaze without gritty texture; sift to avoid lumps.
Complete Cooking Process
-
Ingredient Readiness:
Measure and sift dry ingredients, then set the pastry cream and glaze aside to reach room temperature.
-
Flavor Development:
Warm the chocolate glaze gently; this coaxed heat releases aromatic cocoa oils.
-
Texture Control:
Layer biscuits quickly so they soak just enough cream for softness without becoming mush.
-
Finishing Touches:
Drizzle the chocolate glaze in a zig‑zag pattern, then chill to set.
-
Serving Timing:
Allow the cake to rest in the fridge for at least two hours; slice with a warm knife for clean cuts.
- Use a silicone spatula to spread cream evenly – it keeps the layers smooth.
- Chill the glaze before drizzling to prevent it from running off the cake.
- Add a pinch of sea salt to the glaze for a surprise contrast.
- Top with a few toasted almond slivers for extra crunch.
Pro Tips
I find that a brief pause after assembling lets the flavors mingle, like a quiet moment after a long day. The cake becomes more cohesive, and each bite delivers the gentle snap of the biscuit, the silk of the cream, and the shine of chocolate. It’s the kind of dessert that feels both homemade and polished, perfect for sharing with family or savoring alone.
The essence of the dish:
A fun fact or historical angle:
Flavor or sensory focus:
You Must Know
- Layer quickly to keep biscuits airy
- Cool glaze before pouring
- Serve chilled for best texture
Frequently Asked Questions
→ Can I use gluten‑free biscuits?
Yes, substitute with gluten‑free ladyfingers or sponge; the texture remains similar if they are soft enough to absorb the cream.
→ How long can the cake be stored?
Keep refrigerated in an airtight container for up to 3 days; the glaze may firm up but remains delicious.
→ Can I add fresh fruit?
Thin slices of strawberries or raspberries work well between layers, adding a fresh burst without making the cake soggy.
→ Do I need a special pan?
A simple rectangular dish works; line it with parchment for easy removal.
→ What chocolate percentage is best?
70% dark chocolate gives balance; higher cocoa intensifies bitterness, lower cocoa may be too sweet.
→ Is it possible to make a mini version?
Absolutely – use individual serving glasses or mini loaf pans; adjust cream quantities accordingly.
Chef's Tips
For extra moisture, lightly brush each biscuit with a splash of milk before adding cream.,Use real vanilla beans; the specks add visual appeal and deeper flavor.,If the glaze hardens too much, warm it briefly before drizzling.
Nutrition Facts
per serving
340
Calories
5g
Protein
28g
Carbs
22g
Fat
Taste Profile
Creamy with a bittersweet chocolate finish
Ingredient Substitutions
Don't have an ingredient? Try these alternatives
Bake and cool choux before layering; texture will be more authentic.
Will be sweeter; you may want to reduce powdered sugar in glaze.
Recipe Variations
Try these delicious twists on the original
Spicy Version
Add a pinch of cayenne to the chocolate glaze for a subtle heat.
Mediterranean Style
Replace the glaze with a honey‑orange drizzle and sprinkle toasted pistachios.
Common Mistakes to Avoid
Learn from others' mistakes for perfect results
- Leaving biscuits too long without cream – they become mushy.
- Over‑heating chocolate glaze – it can seize.
- Not chilling long enough – layers won’t set properly.
Meal Prep & Storage
Make Ahead Tips
You can prepare the pastry cream and chocolate glaze up to a day ahead; keep them refrigerated and assemble just before serving.
Leftover Ideas
Refrigerate leftovers and enjoy within two days; bring to room temperature before slicing for best texture.
Perfect Pairings
Serve this with...
Cooking Timeline
Prepare pastry cream: whisk, cook, and cool.
Whip heavy cream and fold into cooled custard.
Arrange biscuit layers and spread cream between each.
Melt chocolate, butter, sugar, and zest for glaze.
Drizzle glaze, garnish, and cover for chilling.
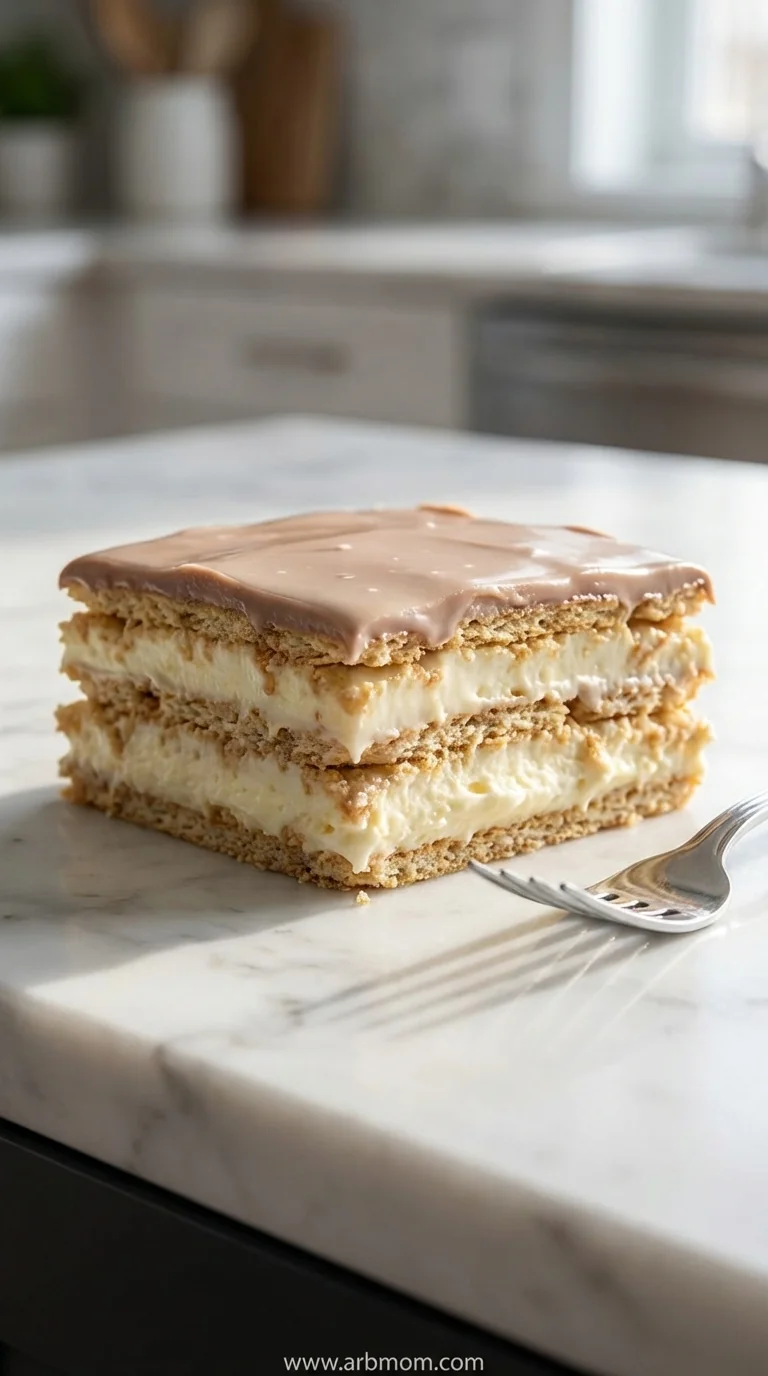
Eclair Icebox Cake
A light, layered dessert that mimics classic eclairs in a no‑bake icebox cake, perfect for a quick sweet treat that feels both elegant and comforting.
Timing
Prep Time
20 Minutes
Cook Time
0 Minutes
Total Time
2 Hours (including chilling)
Recipe Details
Ingredients
Base Layer
- 01 24 ladyfingers or thin sponge cake slices
- 02 1 cup heavy cream
Vanilla Pastry Cream
- 01 2 cups whole milk
- 02 1/2 cup granulated sugar
- 03 4 egg yolks
- 04 3 tbsp cornstarch
- 05 1 vanilla bean, split and scraped
- 06 2 tbsp unsalted butter
Chocolate Glaze
- 01 4 oz dark chocolate (70% cacao), chopped
- 02 2 tbsp unsalted butter
- 03 2 tbsp powdered sugar
- 04 1 tsp lemon zest
Optional Garnish
- 01 Toasted almond slivers
- 02 Extra lemon zest
Instructions
In a saucepan, whisk together milk, sugar, egg yolks, cornstarch, and vanilla seeds; cook over medium heat, stirring constantly, until thickened. Remove from heat, stir in butter, then let cool to room temperature.
While the cream cools, whip 1 cup heavy cream to soft peaks; fold it gently into the cooled pastry cream for a lighter texture.
Lay a single layer of ladyfingers in a rectangular dish; spread a thin coat of the vanilla cream over them, then repeat layers until all biscuits are used, ending with a cream layer on top.
Melt chocolate and butter together in a heat‑proof bowl over simmering water; stir in powdered sugar and lemon zest until smooth.
Pour the chocolate glaze over the top, letting it drip down the sides; sprinkle with toasted almond slivers and extra zest if desired.
Cover the dish with plastic wrap and refrigerate for at least two hours, or overnight for best flavor integration.
Notes & Tips
- 1 For extra moisture, lightly brush each biscuit with a splash of milk before adding cream.
- 2 Use real vanilla beans; the specks add visual appeal and deeper flavor.
- 3 If the glaze hardens too much, warm it briefly before drizzling.
Tools You'll Need
-
Rectangular baking dish
-
Medium saucepan
-
Whisk
-
Spatula
-
Heat‑proof bowl
-
Double boiler or saucepan for melting chocolate
Must-Know Tips
- Don't let the biscuits sit too long without cream – they can become overly soft.
- Let the glaze cool slightly before pouring; it will set nicely without sliding off.
- Taste the pastry cream before folding in whipped cream; adjust sweetness if needed.
Professional Secrets
- Temper the chocolate gently to keep shine.
- Use a kitchen torch to lightly caramelize the top for a rustic look (optional).
- Whisk the cornstarch slurry well to avoid lumps in the cream.

Recipe by
EmilyEmily is a passionate food blogger and seasoned recipe creator at Arbmom Recipe, where she brings her culinary expertise and creativity to home cooks ...
Get Delicious Recipes Weekly
Join 25,000+ home cooks getting our best recipes straight to their inbox.
Free forever • No spam • Unsubscribe anytime