Why You'll Love It
- - Light, airy texture that melts in your mouth
- - Fresh strawberry flavor without any fuss
- - Easy to portion and serve, perfect for gatherings
- - Minimal cleanup; just a few bowls and a tin
*"These cups are like a hug in a bite—so airy and fresh!"*
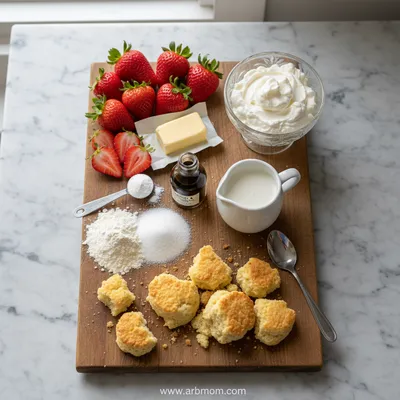
Essential Ingredient Guide
- All‑purpose flour: Choose a finely sifted flour for the fluffiest crumb; it helps the batter rise evenly.
- Fresh strawberries: Pick ripe, fragrant berries; they add natural sweetness and a lovely pink hue.
- Heavy cream: Whipped lightly, it balances the cake’s lightness with a silky finish.
- Baking powder: Provides the lift that makes the cups airy; measure precisely.
- Lemon zest: A tiny bit brightens the flavor, cutting through the sweetness.
- Honey: Adds a gentle sweetness and helps the crust turn golden.
Complete Cooking Process
-
Ingredient Readiness:
Sift the flour, measure the leavening, and slice the strawberries so everything is ready to go.
-
Flavor Development:
Whisk the butter and honey until frothy, then fold in the wet ingredients to keep the batter light.
-
Texture Control:
Gently fold the dry flour mixture into the wet batter, avoiding over‑mixing.
-
Finishing Touches:
Top each cup with a strawberry half and a dollop of whipped cream just before serving.
-
Serving Timing:
Serve the cups at room temperature or slightly chilled for the best contrast of warm cake and cool cream.
- Use room‑temperature butter for a smoother batter
- Don't over‑mix; a few streaks of flour are okay
- Chill the strawberries briefly for extra firmness
- Line the tin with parchment for easy release
Pro Tips
I’ve found that a gentle tap on the countertop releases the cups without tearing their delicate tops. It’s a small habit that makes a big difference, especially when you’re making a batch for guests. Take a moment to breathe, enjoy the soft aroma, and remember that a simple dessert can become a quiet celebration.
The essence of the dish:
A fun fact or historical angle:
Flavor or sensory focus:
You Must Know
- Do not over‑bake; the cups stay moist inside
- Fresh berries keep the flavor bright
- A pinch of salt enhances the sweet notes
Frequently Asked Questions
→ Can I use frozen strawberries?
Yes, just thaw and pat dry; they’ll still add sweetness, though the texture will be softer.
→ What if I don’t have a mini‑tart pan?
A regular muffin tin works fine; just fill each cup a bit less to keep them soft.
→ How long do the cups stay fresh?
Store them airtight at room temperature for up to 2 days, or refrigerate for up to 4 days.
→ Can I make them ahead of time?
Absolutely—bake the cups, let cool, then add strawberries and cream just before serving.
→ What sweetener can I substitute for honey?
Maple syrup or agave work well, using the same amount.
→ Is gluten‑free possible?
Swap the all‑purpose flour for a gluten‑free blend; the texture remains light.
Chef's Tips
If you prefer a richer flavor, brush the tops with a little melted butter before baking.,For a decorative touch, garnish with a small mint leaf.,The cups can be frozen; reheat gently in the oven before adding fresh strawberries.
Nutrition Facts
per serving
210
Calories
4g
Protein
28g
Carbs
9g
Fat
Taste Profile
Bright strawberry sweetness with a light buttery cake base
Ingredient Substitutions
Don't have an ingredient? Try these alternatives
Use a 1:1 substitution; the texture stays light.
Keeps it dairy‑free; adds a faint coconut note.
Recipe Variations
Try these delicious twists on the original
Spicy Version
Add a pinch of ground ginger and a drizzle of jalapeño honey for a subtle kick.
Mediterranean Style
Fold in a tablespoon of finely crumbled feta and a few basil leaves for a savory twist.
Common Mistakes to Avoid
Learn from others' mistakes for perfect results
- Over‑mixing batter, leading to dense cups
- Adding strawberries too early, making the cake soggy
- Baking too long, causing a dry texture
Meal Prep & Storage
Make Ahead Tips
You can bake the cups a day ahead, store them sealed, and add the strawberries and whipped cream just before serving.
Leftover Ideas
Reheat gently in a 300°F oven for 5 minutes; add fresh strawberries afterward.
Perfect Pairings
Serve this with...
Cooking Timeline
Preheat oven, gather and measure all ingredients.
Mix dry ingredients, cream butter and honey, combine all to form batter.
Fill pan, bake, while cooling whip cream.
Add strawberries and whipped cream, serve or store.
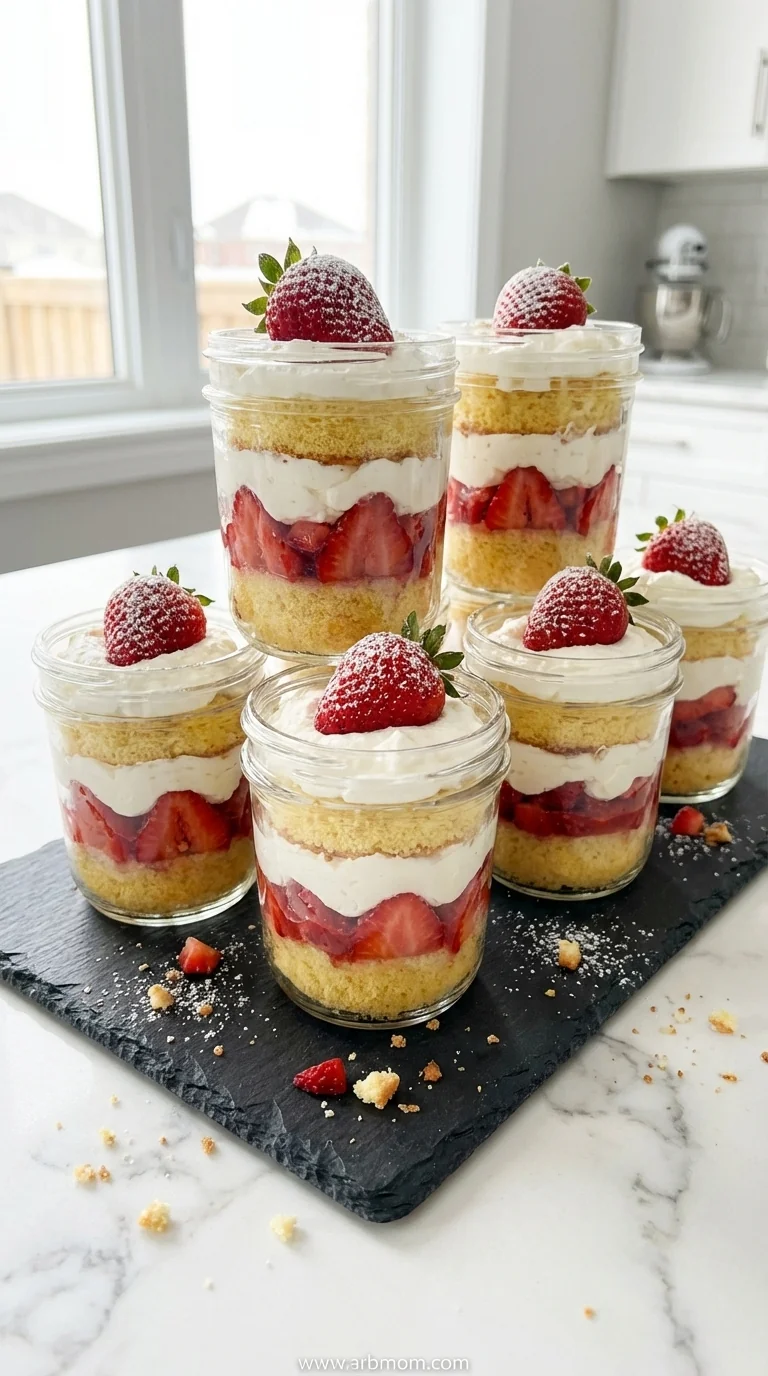
Easy Strawberry Shortcake Cups
Light, fluffy, and bursting with fresh strawberry goodness, these shortcake cups are perfect for a quick dessert or a sweet snack any time of day.
Timing
Prep Time
15 Minutes
Cook Time
12 Minutes
Total Time
27 Minutes
Recipe Details
Ingredients
Cake
- 01 1 cup all‑purpose flour
- 02 1 tsp baking powder
- 03 1/4 tsp salt
- 04 4 tbsp unsalted butter, softened
- 05 2 tbsp honey
- 06 1/3 cup milk
- 07 1 large egg
- 08 1 tsp vanilla extract
- 09 Zest of 1/2 lemon
Filling & Topping
- 01 2 cups fresh strawberries, hulled and sliced
- 02 1 cup heavy cream
- 03 2 tbsp powdered sugar
- 04 1 tsp vanilla extract
Instructions
Preheat the oven to 350°F (175°C). Lightly grease a 12‑cup mini‑tart pan or line with parchment.
In a bowl, whisk together flour, baking powder, and salt. Set aside.
In a separate bowl, beat butter and honey until fluffy, then add egg, milk, vanilla, and lemon zest; mix until smooth.
Fold the dry ingredients into the wet mixture just until combined; avoid over‑mixing.
Spoon batter into each cup, filling about 2/3 full. Bake for 10‑12 minutes, until tops are lightly golden.
While the cups cool, whip the heavy cream with powdered sugar and vanilla until soft peaks form.
Top each cup with a strawberry half, then add a dollop of whipped cream. Serve immediately or chill briefly.
Notes & Tips
- 1 If you prefer a richer flavor, brush the tops with a little melted butter before baking.
- 2 For a decorative touch, garnish with a small mint leaf.
- 3 The cups can be frozen; reheat gently in the oven before adding fresh strawberries.
Tools You'll Need
-
Mini‑tart pan (12‑cup)
-
Mixing bowls
-
Hand mixer or whisk
-
Spatula
-
Measuring cups and spoons
Must-Know Tips
- Don’t over‑mix the batter, it can make the cups dense.
- Allow the cups to cool slightly before adding cream, else it will melt.
- Pat strawberries dry to avoid soggy tops.
Professional Secrets
- Room‑temperature butter emulsifies better, giving a smoother crumb.
- Sift the flour twice for extra lightness.
- Finish with a quick broil for a golden tip, but watch closely.

Recipe by
EmilyEmily is a passionate food blogger and seasoned recipe creator at Arbmom Recipe, where she brings her culinary expertise and creativity to home cooks ...
Get Delicious Recipes Weekly
Join 25,000+ home cooks getting our best recipes straight to their inbox.
Free forever • No spam • Unsubscribe anytime