Why You'll Love It
- - Creamy vanilla ice cream feels like a cold hug
- - Butter‑rich crust adds a subtle crunch
- - Simple to assemble, no fancy equipment needed
- - Perfect for birthdays, holidays, or quiet evenings
*I couldn't believe how close it tasted to the real thing!*
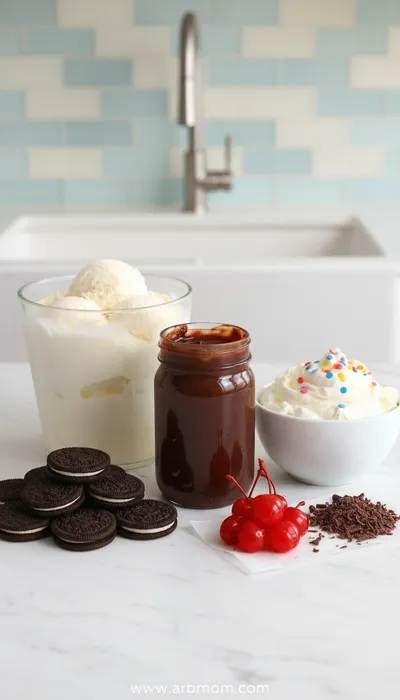
Essential Ingredient Guide
- Graham cracker crust: Choose unsweetened crumbs for balance; press firmly for a sturdy base
- Premium vanilla ice cream: Soften slightly before layering to avoid cracks
- Chocolate fudge topping: Warm just enough to drizzle, preserving its glossy sheen
- Whipped topping: Provides airy contrast to the dense ice cream
- Fresh berries (optional): Add a burst of acidity and color just before serving
- Sprinkles or shaved chocolate: Finish with a decorative crunch, optional but delightful
Complete Cooking Process
-
Ingredient Readiness:
Soften the ice cream, crush the crackers, and melt the chocolate – having everything within reach smooths the assembly.
-
Flavor Development:
Allow the crust to sit for a minute; the butter melts slightly, creating a subtle aromatic base.
-
Texture Control:
Spread the ice cream evenly, then chill to set before adding the fudge.
-
Finishing Touches:
Drizzle warm fudge, add whipped topping, and sprinkle berries or chocolate shavings.
-
Serving Timing:
Serve within two hours of assembly for optimal firmness and flavor.
- Use a springform pan for easy removal
- Freeze the assembled cake overnight for clean slices
- Optional: layer a thin ribbon of caramel for extra depth
- Keep a spare bowl of softened ice cream for quick repairs
Pro Tips
Well, these little tricks help you avoid crumbling or melting mishaps. When the cake is ready, let it sit at room temperature for a few minutes; the flavors settle and the frosting looks glossy. Ugh, the anticipation when the first slice is cut—it's worth every gentle pause.
The essence of the dish:
A fun fact or historical angle:
Flavor or sensory focus:
You Must Know
- Keep the cake cold until serving
- Avoid over‑mixing the crust to prevent sogginess
- Let the fudge set just enough to hold its shape
Frequently Asked Questions
→ Can I use a different ice cream flavor?
Yes, feel free to swap vanilla for chocolate, strawberry, or any flavor you love; just ensure it’s a sturdy, low‑overrun variety.
→ Do I need a springform pan?
A springform pan makes removal easier, but a regular cake pan works if you line it with parchment and run a knife around the edge.
→ How long can the cake be stored?
Keep it frozen for up to two weeks; thaw briefly before slicing for clean cuts.
→ Can I add a salty component?
A pinch of sea salt in the chocolate drizzle or a layer of caramel can brighten the flavor.
→ What if I don’t have graham crackers?
Use digestives, vanilla wafers, or even pretzel crumbs for a slightly different texture.
→ Is there a dairy‑free version?
Swap the ice cream for a coconut‑based alternative and use a dairy‑free chocolate; the result is still delicious.
Chef's Tips
For a firmer slice, freeze the assembled cake overnight.,If the chocolate drizzle hardens too quickly, gently re‑warm it before pouring.,Use a warm, damp knife for clean cuts through the frozen layers.
Nutrition Facts
per serving
420
Calories
6g
Protein
45g
Carbs
22g
Fat
Taste Profile
Richly sweet with a buttery undertone
Ingredient Substitutions
Don't have an ingredient? Try these alternatives
Use unsweetened varieties for a balanced flavor.
Creates a dairy‑free version with a hint of coconut.
Recipe Variations
Try these delicious twists on the original
Spicy Version
Add a pinch of cayenne to the chocolate fudge for a subtle heat.
Mediterranean Style
Swap the vanilla ice cream for pistachio and garnish with toasted almonds.
Common Mistakes to Avoid
Learn from others' mistakes for perfect results
- Over‑mixing the crust, which makes it soggy.
- Allowing the chocolate glaze to cool too much before pouring.
- Cutting the cake before it’s fully set, leading to crumbly slices.
Meal Prep & Storage
Make Ahead Tips
You can assemble the cake a day ahead; keep it wrapped and frozen, then let it soften briefly before serving.
Leftover Ideas
Refrigerate leftover slices in an airtight container; enjoy within three days.
Perfect Pairings
Serve this with...
Cooking Timeline
Prepare crust: combine crumbs, butter, sugar; press into pan.
Soften ice cream and spread evenly over crust.
Freeze cake to set the ice cream layer.
Melt chocolate with cream and butter; pour over set cake.
Add whipped topping and garnish; final chill before serving.
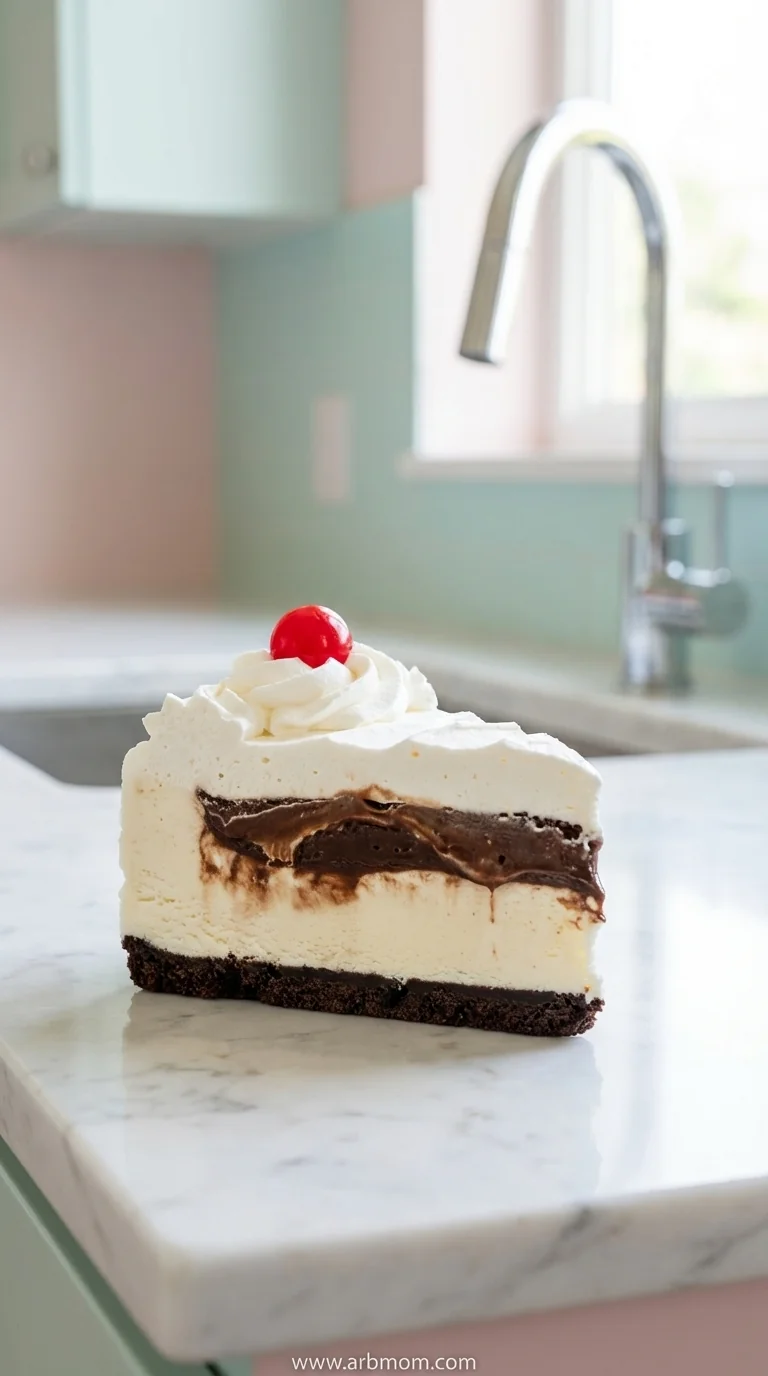
DQ Ice Cream Cake Recipe
A home‑made DQ Ice Cream Cake with creamy vanilla layers and a buttery graham crust, perfect for any celebration.
Timing
Prep Time
20 Minutes
Cook Time
5 Minutes
Total Time
25 Minutes
Recipe Details
Ingredients
Crust
- 01 2 cups graham cracker crumbs
- 02 1/4 cup melted butter
- 03 2 tbsp sugar
Ice Cream Layer
- 01 1½ quarts vanilla ice cream, softened
- 02 2 tbsp milk (optional for smoother spreading)
Chocolate Fudge Topping
- 01 1 cup chocolate chips
- 02 1/4 cup heavy cream
- 03 1 tbsp butter
- 04 Pinch of sea salt
Finishing Touches
- 01 1 cup whipped topping
- 02 Fresh berries or shaved chocolate for garnish
Instructions
Combine the graham cracker crumbs, melted butter, and sugar; press the mixture firmly into the bottom of a 9‑inch springform pan.
Place the crust in the freezer while you smooth the softened vanilla ice cream over it, adding a splash of milk if needed for easy spreading.
Return the pan to the freezer and let the ice cream set for at least 1 hour, or until firm.
In a small saucepan, melt chocolate chips, heavy cream, butter, and sea salt over low heat, stirring until glossy; pour the warm fudge over the set ice cream.
Top with a generous layer of whipped topping and garnish with berries or shaved chocolate; slice and serve immediately or keep frozen until needed.
Notes & Tips
- 1 For a firmer slice, freeze the assembled cake overnight.
- 2 If the chocolate drizzle hardens too quickly, gently re‑warm it before pouring.
- 3 Use a warm, damp knife for clean cuts through the frozen layers.
Tools You'll Need
-
9‑inch springform pan
-
Food processor or zip‑top bag for crumbs
-
Spatula
-
Saucepan
-
Whisk
-
Measuring cups and spoons
Must-Know Tips
- Don’t over‑mix the crust, it can become soggy
- Let the cake rest at room temperature a few minutes before serving for easier slicing
- Taste the fudge before pouring; adjust salt if needed
Professional Secrets
- Use high‑quality vanilla ice cream for richer flavor
- Melt chocolate slowly to keep it silky
- Press the crust evenly for consistent bite

Recipe by
EmilyEmily is a passionate food blogger and seasoned recipe creator at Arbmom Recipe, where she brings her culinary expertise and creativity to home cooks ...
Get Delicious Recipes Weekly
Join 25,000+ home cooks getting our best recipes straight to their inbox.
Free forever • No spam • Unsubscribe anytime