Why You'll Love It
- - Minimal effort, no oven required
- - Light, airy texture that feels like a cloud
- - Classic flavors that never go out of style
- - Great for make‑ahead gatherings
*"The texture is just perfect—soft cake, creamy filling, and that chocolate glaze sings!"*
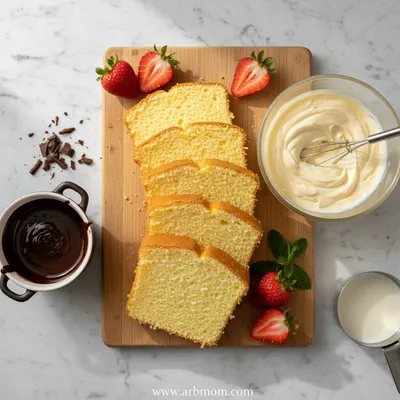
Essential Ingredient Guide
- Sponge cake: Use a light, store‑bought vanilla cake or bake a simple genoise; it should be soft enough to absorb the custard.
- Vanilla custard: A silky custard made with real vanilla beans adds depth; whisk until smooth to avoid lumps.
- Chocolate glaze: Dark chocolate gives a slight bitterness that balances the sweet custard.
- Heavy cream: For the glaze, heavy cream creates a glossy sheen and a velvety mouthfeel.
- Lemon zest: A touch of zest brightens the custard and cuts through the richness.
- Sugar: Adjust the sweetness of the custard and glaze to taste; start with less and add more if needed.
Complete Cooking Process
-
Ingredient Readiness:
Gather all components, soften the cake, and chill the custard mixture before assembly.
-
Flavor Development:
The custard gently simmers with vanilla, allowing the flavors to meld before cooling.
-
Texture Control:
Layer the cake and custard carefully so the cake soaks just enough without becoming soggy.
-
Finishing Touches:
Pour the warm chocolate glaze over the assembled layers, letting it set into a glossy coat.
-
Serving Timing:
Refrigerate for at least two hours; serve chilled for the best sliceable texture.
- Use a chilled metal bowl for the custard to speed up setting
- Add a pinch of salt to the chocolate glaze for depth
- Cover the cake loosely with plastic wrap to prevent freezer burn
- Slice with a warm knife for cleaner cuts
Pro Tips
Well, those little adjustments can really elevate the experience. I remember a time when I forgot the pinch of salt and the glaze felt flat—adding it later made all the difference. So, keep those tips in mind, and enjoy the gentle patience of this dessert.
The essence of the dish:
A fun fact or historical angle:
Flavor or sensory focus:
You Must Know
- Use a full‑fat custard for richness
- Do not over‑soak the cake layers
- Allow the glaze to set before slicing
Frequently Asked Questions
→ Can I make this cake ahead of time?
Yes, you can assemble and refrigerate it up to 24 hours; the flavors will meld nicely.
→ What kind of cake works best?
A light vanilla sponge or a store‑bought angel cake provides the right texture.
→ Do I need to bake the custard?
The custard is cooked on the stovetop until thickened, then cooled before using.
→ Can I substitute the chocolate glaze?
A simple chocolate ganache made with dark chocolate and cream works perfectly.
→ Is this recipe gluten‑free?
Use a gluten‑free sponge or almond flour cake to make it safe for gluten‑sensitive guests.
→ How do I store leftovers?
Keep the cake covered in the refrigerator; it stays fresh for three days.
Chef's Tips
If the custard seems too thick, whisk in a splash of cold milk after cooling.,For extra shine, brush the glaze with a light coating of melted butter before chilling.,You can add a thin layer of strawberry jam between cake and custard for a fruity twist.
Nutrition Facts
per serving
310
Calories
5g
Protein
28g
Carbs
18g
Fat
Taste Profile
A balanced harmony of creamy vanilla and bittersweet chocolate.
Ingredient Substitutions
Don't have an ingredient? Try these alternatives
Results in a slightly thinner custard; add a bit more cornstarch if needed.
Will be a touch sweeter; reduce added sugar in the glaze.
Recipe Variations
Try these delicious twists on the original
Strawberry Delight
Layer fresh sliced strawberries between the cake and custard for a fruity contrast.
Coffee Infusion
Add a teaspoon of espresso powder to the custard for a subtle coffee note.
Common Mistakes to Avoid
Learn from others' mistakes for perfect results
- Over‑mixing the custard, which can make it grainy.
- Pouring glaze while too hot, causing the custard to melt.
- Skipping the chilling step; the glaze won’t set properly.
Meal Prep & Storage
Make Ahead Tips
You can whisk and chill the custard up to 24 hours ahead; keep it covered and give it a quick stir before layering.
Leftover Ideas
Refrigerate leftovers; enjoy within three days. For a quick snack, slice and serve with fresh fruit.
Perfect Pairings
Serve this with...
Cooking Timeline
Gather and measure all ingredients; slice the cake.
Cook custard on the stovetop until thickened, then cool.
Prepare chocolate glaze; melt chocolate, cream, butter, and coffee.
Assemble layers of cake and custard, then pour glaze over top.
Chill the cake in the refrigerator to set the glaze.
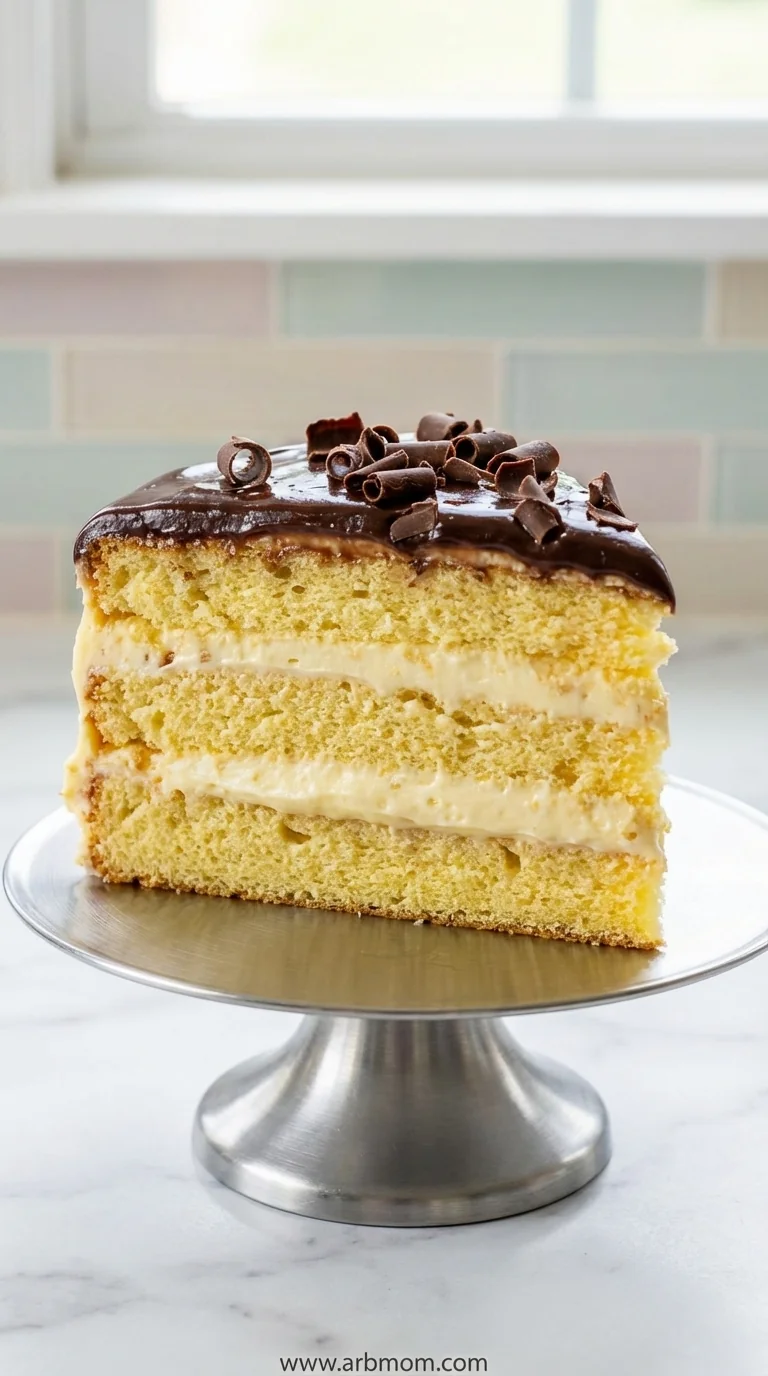
Boston Cream Icebox Cake
Layer fluffy sponge with a silky vanilla custard and a glossy chocolate glaze. This Boston Cream Icebox Cake comes together quickly, stays cool in the fridge, and offers a sweet, airy treat for any season.
Timing
Prep Time
20 Minutes
Cook Time
15 Minutes
Total Time
35 Minutes
Recipe Details
Ingredients
Cake Layer
- 01 1 pre‑made vanilla sponge cake (about 9 inches), cut into 1‑inch slices
- 02 1‑2 tbsp milk (optional, to lightly moisten layers)
Vanilla Custard
- 01 2 cups whole milk
- 02 1/2 cup granulated sugar
- 03 4 large egg yolks
- 04 3 tbsp cornstarch
- 05 1 vanilla bean, split and scraped (or 2 tsp pure vanilla extract)
- 06 Pinch of salt
Chocolate Glaze
- 01 1 cup dark chocolate chips
- 02 1/2 cup heavy cream
- 03 1 tbsp unsalted butter
- 04 1 tsp instant coffee granules (optional, enhances chocolate)
Garnish
- 01 Whipped cream
- 02 Chocolate shavings
Instructions
In a saucepan, combine milk, sugar, vanilla bean pods, and a pinch of salt. Warm gently until just simmering, then remove from heat.
Whisk egg yolks with cornstarch in a bowl; slowly pour the hot milk mixture over the yolks while whisking continuously.
Return the mixture to the stove over medium heat, stirring until thickened, about 3‑4 minutes. Remove, stir in vanilla extract (if using), and let cool completely.
Place a cake slice on a serving dish, spread a thin layer of custard, then repeat layers, ending with custard on top.
Melt chocolate, cream, butter, and coffee in a heat‑proof bowl over simmering water; stir until glossy, then pour over the assembled cake, spreading evenly. Chill for at least two hours before serving.
Notes & Tips
- 1 If the custard seems too thick, whisk in a splash of cold milk after cooling.
- 2 For extra shine, brush the glaze with a light coating of melted butter before chilling.
- 3 You can add a thin layer of strawberry jam between cake and custard for a fruity twist.
Tools You'll Need
-
Saucepan
-
Whisk
-
Mixing bowls
-
Spatula
-
9‑inch serving plate
-
Heat‑proof bowl for melting chocolate
Must-Know Tips
- Do not over‑cook the custard; it should coat the back of a spoon.
- Allow the glaze to cool slightly before pouring; this avoids melting the custard.
- Cover the cake with plastic wrap while chilling to prevent it from absorbing refrigerator odors.
Professional Secrets
- Temper the chocolate glaze with a touch of butter for extra gloss.
- Infuse the custard with vanilla beans rather than extract for depth.
- Use a chilled metal bowl to set the custard faster.

Recipe by
EmilyEmily is a passionate food blogger and seasoned recipe creator at Arbmom Recipe, where she brings her culinary expertise and creativity to home cooks ...
Get Delicious Recipes Weekly
Join 25,000+ home cooks getting our best recipes straight to their inbox.
Free forever • No spam • Unsubscribe anytime